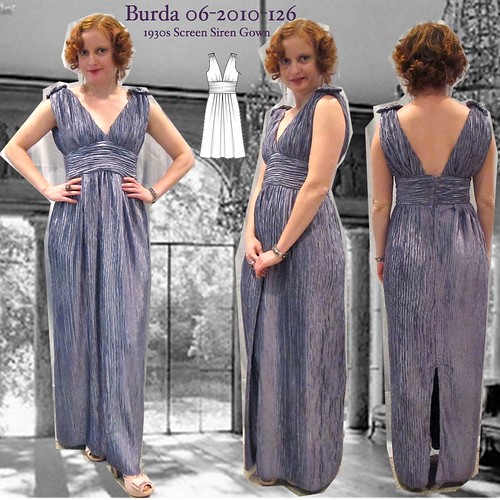
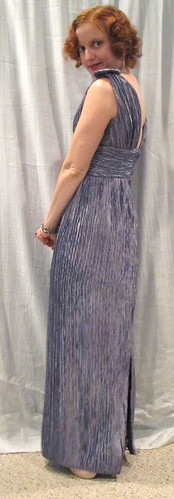
Burda 06-2010-126, 1930s Old Hollywood Glamour Evening Gown
One of our PR Weekend DC events (in addition to cake!) was visiting Exquisite Fabrics, which has to move out of the creepy Georgetown mall after only a couple of years because the mall's developer plans to renovate it, hopefully to make it less creepy. Exquisite has not yet found a new space, but they are open through January 2012. In the many years I'd visited it periodically, I had only bought one piece of fabric at Exquisite because much of it is high end (and high dollar) and I don't share enough taste with their buyer to spend the money. They carry a huge selection of wool in all colors, and the one piece I bought was to match a wool jacket purchased at a thrift store--found the perfect piece. Anyway, for their moving sale most things are 50% off, so I went bargain hunting.
 |
| Joan Crawford |
 |
| Jean Harlow |
Next step was to find a pattern. I wanted a triangle top front and back, but of course I purged all the sundresses out of my pattern collection because of my fear of sunburn (over the summer I realized that I want at least one strappy dress for evenings). I went through my Burdas and came up with Burda 06-2010-126, which has the requisite triangle top, and a midriff band, which is flattering for me.
I wasn't into the shoulder ruffle, but the shoulder line is the marked gather line so it was easy enough to leave off the extra ruffle bit.
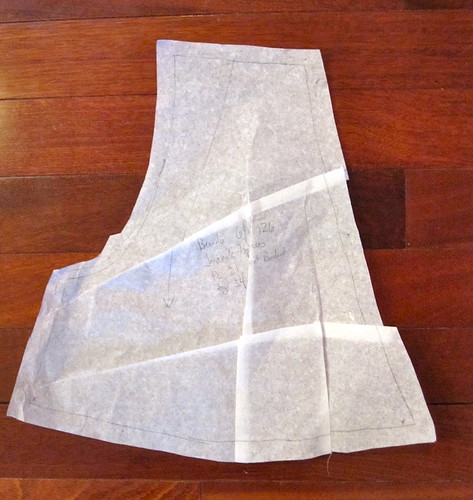
I started by muslining the bodice. Well, I was hoping the muslin could become the lining, but I had to change it significantly enough that it was just a muslin. Before cutting the muslin I shortened the diagonal neckline and narrowed the gather area on the front bodice for a small bust adjustment.
After muslining, I took another tuck in the diagonal front neckline to shorten it further.
The muslin revealed the armscye to be uncomfortably high. This is unusual on a BWOF pattern for me. I lowered the armscye about 1/2 inch.
I also found the shoulder too tall at the shoulder edge. This might have something to do with the gathered design, but I gathered my shoulder as well, just without the standing ruffle. I had to shorten the shoulder about 1/2 inch at the shoulder, tapering to nothing at the neck (this also influenced how much I had to lower the armscye).
Then it was time to make the terrifying first cut into my most-expensive-ever and totally-irreplaceable fabric. I pinned the pattern in place and walked away a few times before taking a deep breath and cutting.

Of course, I did make a mistake! I combined the midriff pieces so that it would be a single length of fabric with a CB seam. I also changed the shape--the original shape was narrower at the top and wider at the bottom. I am shaped wider at the ribcage and narrower in the waist, as are most people, so the design was a little odd. I cut the midriff on the fold, and it turned out I didn't have the fabric laid out perfectly on the underside of the fold, and the pleats started wandering downward at the CB seam on one side. Ugh!!!!
As it turns out, I had to fix that anyway. For the midriff, I cut my usual size 34 at the ribcage to 36 at the waist. It fit in the muslin, but somehow in the real fabric I found it *much* too small. I added a squidge over an inch at each side using fabric insets. I was so upset to have to interrupt my smooth line, but it had to be done, and it allowed me to re-cut that wandering, off grain side (didn't have enough fabric to re-cut the entire midriff).
I underlined the midriff with lightweight lining fabric. The weight of the skirt was hanging from it and it had to be stabilized. I hand-stitched in the ditch at the side inset seamlines to keep the midriff fabric in place.

I was not 100% sure how I was going to do the skirt when I started the project. I figured I'd get the bodice done and then drape the skirt in place. I figured I would need to do some side-seam shaping. But while making the bodice, I saw that the pleated fabric gathered unexpectedly well, so when it came time for the skirt I just used the entire large piece of fabric.
I did not want to cut off the upper selvage as the fabric frays weirdly (more like fuzzes), even after being serged. So I determined the skirt length (based on my shoes--I wore heels, OMG--Born Divinity, which is as comfortable as a heel that high can possibly be, which is to say, not very unless you are sitting down), which turned out to be 3 inches shorter than the manufactured width of the fabric. I chalk-marked the skirt seamline and put my gathering stitches in above the chalk-line. Then gathered and stitched to the midriff along the marked line.
I was so relieved with how easy this was, because I had been really sweating the timing. I *planned* to have loads of time over the holiday, as I had two days off work after I returned from Texas. Well, those days just evaporated and it got to the point where I had about 10 hours of available time before the wedding (assuming I sewed up to the moment I needed to leave) to finish the bodice, drape the skirt, and do miles of hand-sewing. I had budgeted 1.5 hours for the skirt and it only took about 40 minutes. Once it was on I breathed a sigh of relief that I would actually finish in time!
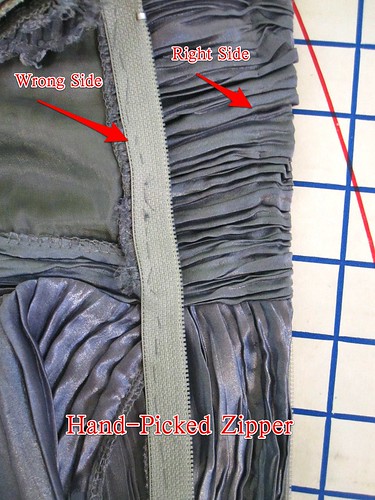
After the skirt was on it was time for the hand-picked zipper. I use invisible zippers almost exclusively, and have completely lost my ability to install a regular zipper by machine. After the last disastrous attempt, I decided that any time I need to put in a regular zipper, I will just do it by hand. It's faster and nicer looking in the long run. I didn't want to attempt to get an invisible zipper past the heavy seam at the midriff, so hand-picked zipper it was.
I started doing a beaded hand-picked zipper, but sadly it just looked like a total non-sequitor on this dress. So I ripped out the beads and started over. I had a couple of false starts, but eventually got the zipper in and looking pretty good. The prick-stitching is practically invisible in this fabric, so all my hard work can't be seen!
After that hand stitching was done, it was on to hand-stitching the edges of the walking slit. Although I *could* walk in the dress if the CB seam was sewn all the way down, I did have some restricted motion so I went with a slit. I used the selvage as the hem.

Next I needed to hand-sew the midriff lining in place over the skirt/midriff seam. This had been on my schedule as a "dress can be worn without this" item, but I ended up having loads of time in the end. So it was properly finished on the inside. I used a lightweight but color-matching lining for the bodice in because I thought I would twist the shoulders, and a nicer but non-matching lining at the midriff.
My original vision was to twist the shoulder straps before sewing the side seams, as I did several years ago on the Vogue 8386 I'm wearing in my profile photo. Unfortunately, the fabric was just too thick for it to look nice. I needed to have re-drafted the bodice to have a thin strap, rather than a thick gathered one. Alas. So I gathered the shoulders (by hand).
The final step was embellishment. This is always a mine field for me because I do not trust my eye. I have a magpie instinct to pile on the shiny and the frilly. When I was buying the fabric, the owner at Exquisite had said it was a great purchase because you can use every inch of it. He demonstrated by folding a bit of the fabric with the pleats running vertically and then fanning out the pleats. I was suitably impressed.
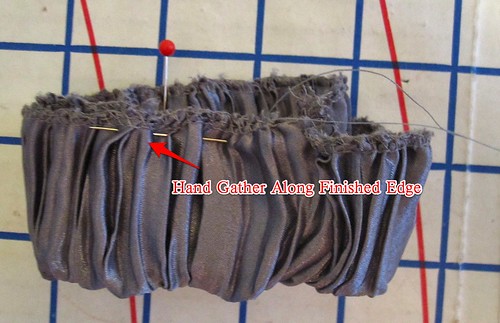
So I took my scraps and made them into flowers, using a sort of modified yoyo technique. First, I cut rectangles of fabric, with the pleats running down the short side.
I took them to the serger and finished all the edges, due to the fuzzy fraying.
Next, I sewed the edges together, with the pleats running parallel to the edges, to make tubes.

Then folded them in half, wrong sides together (with the seam along the inside), and did a running stitch by hand around the edges.
Pull the running stitch tight and knot in place, and then open out the flower. Voila!

I bought some purple ribbon flowers in Dallas while visiting the fabric stores there. I put the dress on my paper tape double and pinned the self-fabric and purple flowers cascading over the neckline on one side. When I tried the dress on I couldn't tell if it was cute or 70s bridesmaid. I unpinned all the flowers and started over, but just couldn't find anything I like. Then as sort of a joke I put two big flowers on my shoulders and oddly, it totally worked. Who would have guessed? They are "upside down"--cupping the shoulders. I covered the messy middles with sparkly beads.

My last embellishment was to sprinkle (and by "sprinkle" I mean individually hand sew) small, very subtle smoky glass beads in the pleats of the midriff. I'm not sure if they show at all to anyone not specifically looking for them, but my hope is that they randomly catch the light on occasion. I like them, at any rate.
I could not believe how smoothly this went! I had time to put my hair up in pincurls, make my dangle earrings, and even take a nap--which turned out to be very smart as we were out until 4:30 am that night!!!

I was entirely thrilled with the way the dress came out. I felt that it captured my inspiration without being costumey and I felt utterly glamorous after an initial panic with my hair (when I took out the bobby pins the curls stuck straight to my head and I looked more Little Orphan Annie than movie star--combing, weighing down with clips, and using the curling iron as a straightener finally took care of it). The fit is good and it was comfortable to wear and move in.
I wasn't the only person in a full length dress, thank goodness, and several guests gave me really nice compliments. The bride told me I looked like a movie star, which was so sweet.
I LOVED wearing this dress. It was my first true evening gown. Now I need another occasion to wear it!
All photos are here and the pattern review is here.


Comments
Post a Comment