Burda 01-2009-110, Mock Wrap Top
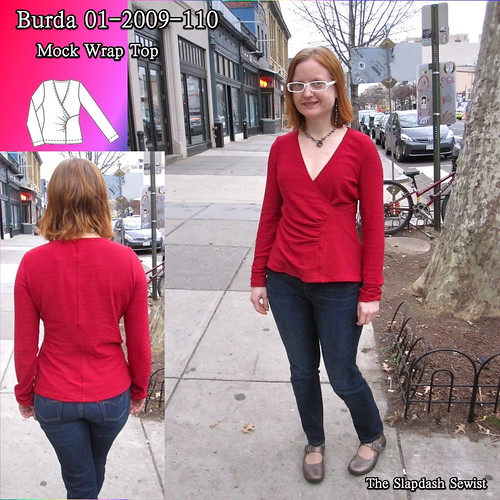
I have been wanting to make Burda 01-2009-110, a mock wrap top with a side panel, since it came out in the magazine. I even traced it about a year ago, but hadn't gotten around to it. While the serger was threaded in red, I finally did it in the sparkle sweater knit I just got from Fabric.com.
Unfortunately, I didn't make a great choice in the fabric, as it is just too much bulk for this particular pattern. The stretch and recovery are also not firm enough. So beware: if you want to make this top, to use a normal knit with a good lycra content, not a specialty knit like sweaterknit or rib knit.
I did my usual Small Bust Adjustment for a crossover top of shortening the crossover. This top has separate right and left front patterns, so be sure to adjust both (or not, read on).
To further ensure that I would have no gapage in wearing, I finished the neckline with clear elastic cut slightly shorter than the neckline and a twin needle.
Note that although the instructions did not seem to tell you this, the neckline must be finished before the side panel is inserted. I sewed the CB and shoulder seams and then finished the neckline before proceeding.
As I recall, the pattern is not drafted with a CB seam but I need one for my swayback. I have also finally wised up on duplicative pattern tracing. As mentioned previously, I have been developing a TNT tee. I used my perfected back and sleeve for this pattern (actually, my TNT sleeve comes from this pattern), and only used the front pattern pieces for this particular pattern. This is going to save me a lot of time in tracing in the future! I have also developed a TNT woven sleeve for Burda projects and will stop tracing a new sleeve for each project that just uses a plain set-in sleeve. Why didn't I think of this years ago?
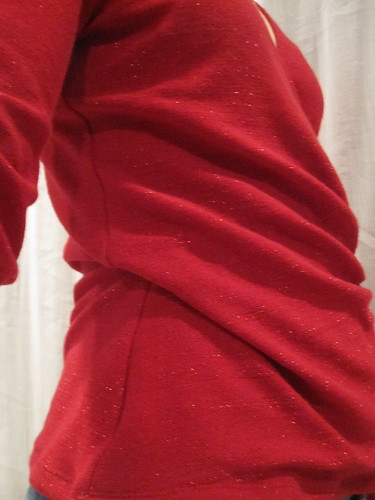
I was so proud of my cleverness in making sure the neckline wouldn't gape. Then I tried the top on. Um. As you can see on the right, the shortened neckline seriously pulls and distorts the side seam where it is attached. I've not had that problem before with my SBA, but I can't think of another pattern I've done where the neckline is attached all the way at the side seam.
I marked about 1/2 inch below the crossover and removed the clear elastic below that marking and then just stretched out the neckline seam as much as I could. The pulling is reduced, but not entirely eliminated (sorry, don't have a good after shot as I have obscured the side seam with my arm in this shot).

Although the sweater knit is too thick for this pattern, it is also too thin to be worn on its own. Oy.
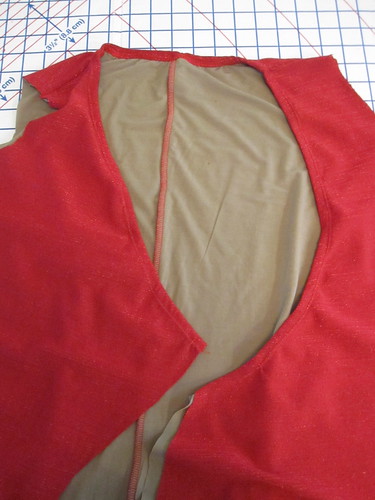
I underlined the body pieces with a tricot type knit (a score on G Street's $2.97/yd table). I thought about trying to do only a half lining on the underlap side of the front, but it got too complicated so I just lined the whole thing.
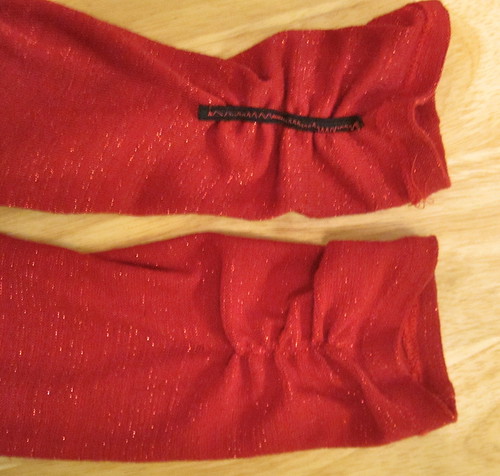
I cut the sleeves full length, and in this wimpy knit they ended up quite long. Rather than cut them off, I stretched a piece of elastic on the inside and zigzagged over it to gather up the length a bit.


I'm going to refrain from tagging this a "fail," but it's not a great project. You can especially see the bulk problem at the front hem, which is stiff and oddly-shaped. If I make this again, I will cut the front underlayer several inches shorter at the hem and finish it before attaching the side panel. That way the visible hem will only be one layer.
The style seems good, though, as long as I can find a balance between a non-gaping crossover and a non-pulling side seam (which may not be possible). We'll see if I try this one again.
All photos are here and the pattern review is here.


Comments
Post a Comment