Burda 10-2011-123, Wrap Dress with Flounce
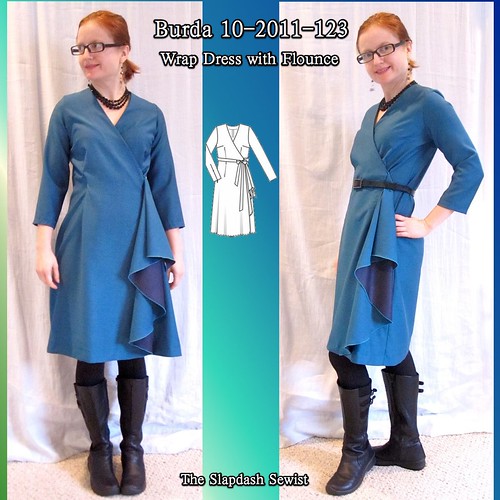
When I was in New York a couple years ago, Kashi talked me into some gorgeous but expensive ($18/yd) double-sided wool. The right side is a beautiful lustrous turquoise, and the underside is a rich black. At the time, it was my most expensive fabric ever, so of course it was a huge dilemma of what to make with it. I wanted to be able to use both sides of the fabric in a subtle way.
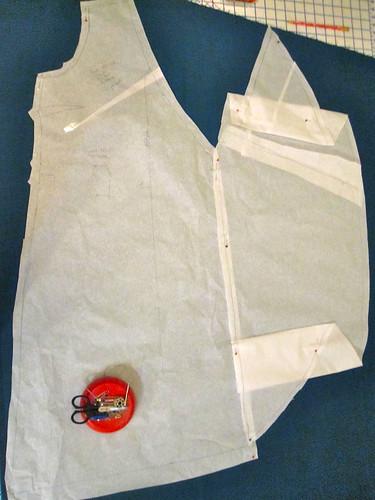
This has been on the list for a while, and I took advantage of a burst of cold weather a couple weeks ago to get it done and wear it. Though tracing and cutting took a bit of time, the dress was actually fairly quick to put together.
So when I got the magazine, Burda 10-2011-123 really jumped out at me. As you can see on the left, the flounce is cut in an improbable shape and ends up showing both sides of the fabric. Tany made this shortly after the magazine came out and I just loved hers.

This dress comes in long, longer, and longest versions. As I am short, shorter, and shortest, that didn't work for me. I shortened it 3 inches from the shortest (non-flounce) iteration, which was about 4 inches shorter than the medium-length flounce version. As you can see, I had to shorten the flounce extension quite a bit.
For the flounce to sit nicely in the completed garment, I had to arrange it and then take a few hand tacks, but this strange shape makes a surprisingly handsome flounce.
The tie construction on the flounce side of the dress is rather ingenious. There is a dart between the flounce and the skirt portion of the dress, and the tie is enclosed in that dart.
The instructions are, unsurprisingly, hopeless, so I gleaned most of my construction knowledge from Tany's blog post and photos.
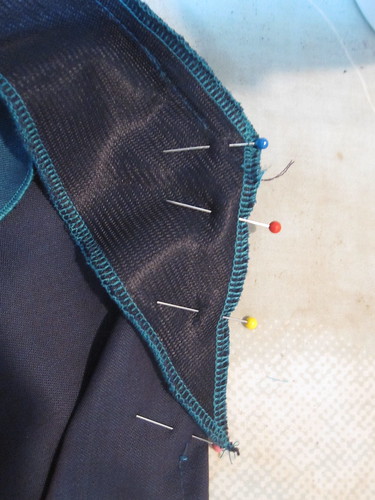
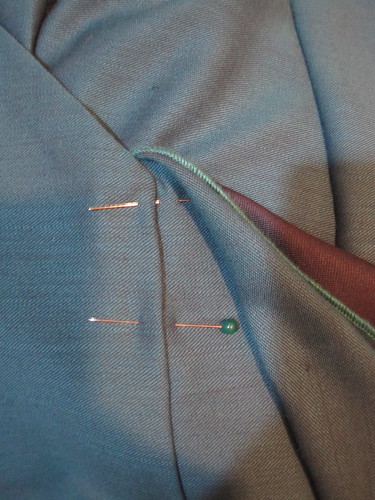
The neckline is finished with a facing. Stitch the facing in place first.
Next, pin the tie into the dart on the right side, as shown at left.
Next fold the facing over the dart and stitch in place, enclosing the tie. You might want to double stitch to ensure the tie stays in place.
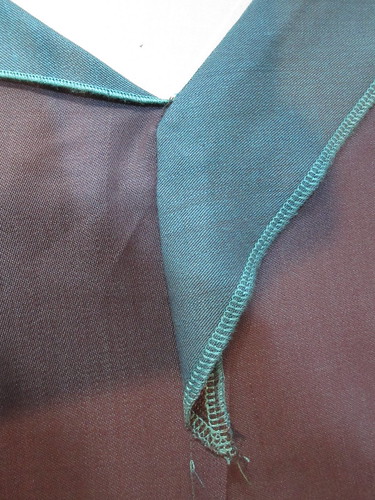
This gives you a neat finish on the inside and the outside, as you can see from these photos.

Unfortunately, once I tried the dress on, I was really unhappy with it. After staring at it for a bit, I identified the tie as one of the things I didn't like.
Although it is not a problem on Tany's version, on mine I felt that the tie and flounce were too much together. It doesn't look bad in this photo, but I think that's because the way I'm angled hides the flounce a bit. It was just weird and unbalanced.
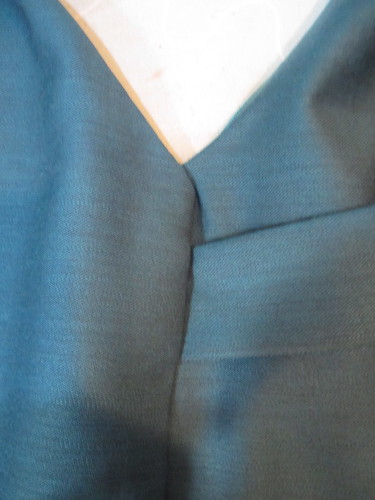
So off came the ties. To keep the dress together I stitched in the ditch at the two front darts, as you can see at right.
Then I inserted an invisible zip into the center back seam so I could get it on and off. I am a whiz at invisible zips in an open seam, she said modestly, but sewing one into a seam closed at both ends is a whole other issue. There are tiny bobble at both top and bottom, but in the end I think it's fairly invisible.
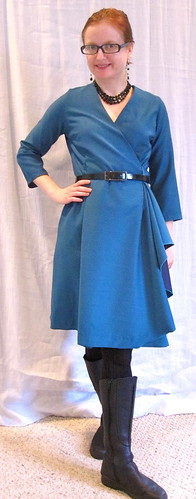
 Unfortunately, I still don't *love* the dress. A dress without a waist seam just does not work for me. I thought this would be ok because it's a wrap dress, but of course then it ended up not being a wrap dress! In a softer fabric this might work, but the wool has a fair amount of body and looks sort of boxy.
 The back is a hot mess. I need to take in those released darts quite a bit so it's not so bunchy back there--maybe even un-release them.
However, I do get to show off both sides of the fabric and better to have sewn a Too Good to Use into a not-perfect project than to let it sit on the shelf forever, right?
All photos are here and the pattern review is here.


Comments
Post a Comment