Burda 05-2011-108, Panel Princess Dress: The Real Deal

I got this vintage home dec fabric from DeBois Textile in Baltimore for $3.50/yd in April 2011. When I got the next Burda magazine and saw Burda 05-2011-108 (available for purchase from BurdaStyle at the link--I am not affiliated or compensated, just trying to be helpful) I immediately knew this fabric would be this dress and I would wear it to Seersucker Social. Unfortunately, I was out of town for last year's Social so the fabric had to wait another year to be made up. But when it rolled around to May it was on!
I mentioned what a nightmare this was to cut in the muslin post. It was hard to see the zigzags through my tissue, and then really hard to keep the pattern pieces straight. I ended up pinning the grainline to the fabric along a single zag and then pinning the rest of the piece in place. It wasn't helped by the fact that I didn't have *quite* enough fabric so the jigsaw of the layout was extremely tedious. I had to cut one of the skirt side pieces slightly off grain.
The real downside of zigzags like this is that, unlike with regular stripes and plaids, once you've cut a piece one time you can't just flip it over on the fabric to cut the other piece. The zigzags are just impossible to trace/keep track of underneath the fabric. So I had to do the set up for each piece twice. I spent about 2 1/2 hours on cutting. So not fun.
Because of the thickness of my fabric I couldn't use an invisible zip, so I decided to go for a lapped zipper to add to the vintage feel. I rewatched What Would Nancy Drew Wear's video tutorial and then found this awesome PDF from sewing.org on putting in a lapped zip (clicking on the link auto-launches the PDF download--their website is not very well-organized and I can't figure out how to give them the traffic). I referred to it about 4000 times while putting in the zipper, and it came out perfectly.
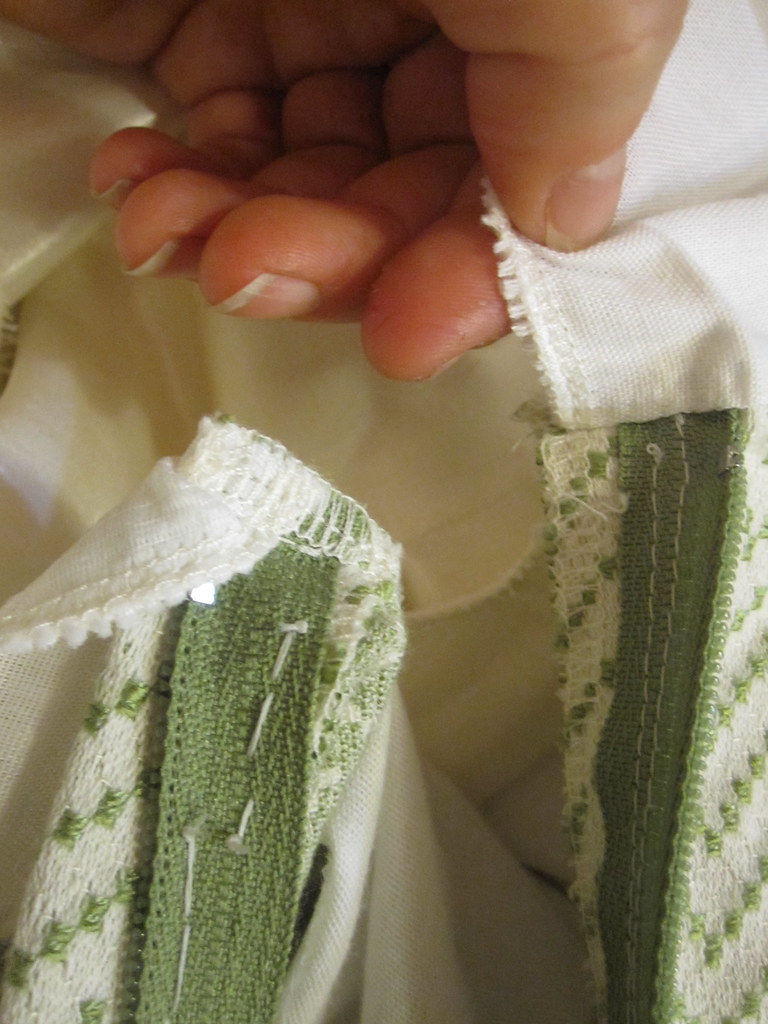
The only thing that nobody addressed was how to handle the lining at the neckline to finish it properly at the zipper. So I just had to sort of make it up.
On the overlap side (the left in the photo above), I folded the lining around the overlap. You can see I could have used some extra width on my lining.
On the underlap side, I just placed the lining and fashion fabric right sides together as normal.
You can see on the right that this finish worked adequately.

To finish the lining, I hand-stitched it to the zipper. There was a lot of hand-stitching in this project!
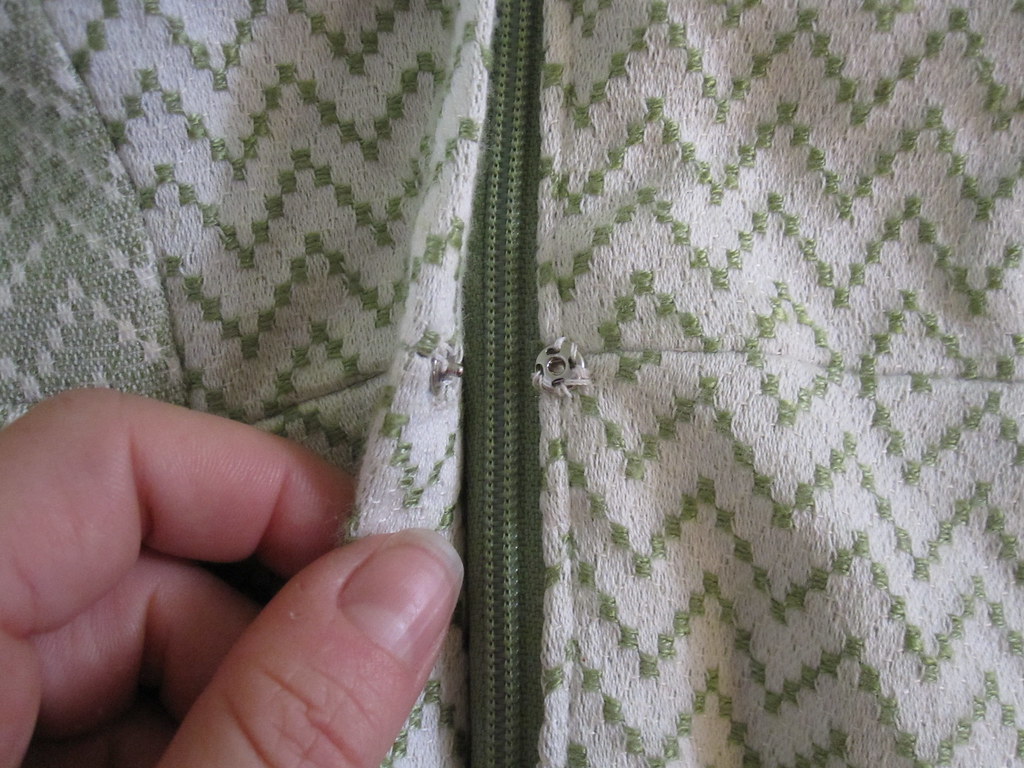
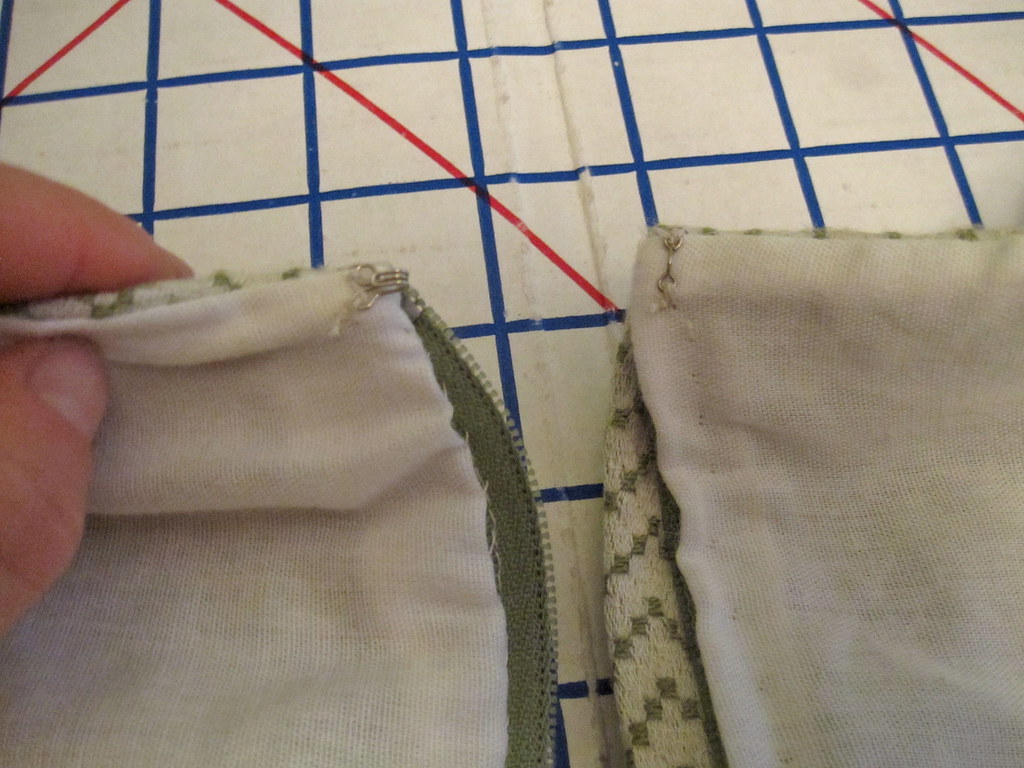
Because of the thickness of my fabric, the overlap stuck out a little at the waist seam, rather than sitting flat. I sewed in a little snap to keep it in place (though I wore a belt with the dress and am likely to do so every time I wear it, which obviated the need for the snap).

I hand-picked the visible/overlap side of the zipper. I am an expert at installing invisible zippers, if I do say so myself, but the last time I tried to install a regular zipper by machine was just so gross that I vowed never to do it again. From henceforth, any regular zippers would be installed by hand. The hand stitches pretty much disappear into this thick, loosely woven fabric.
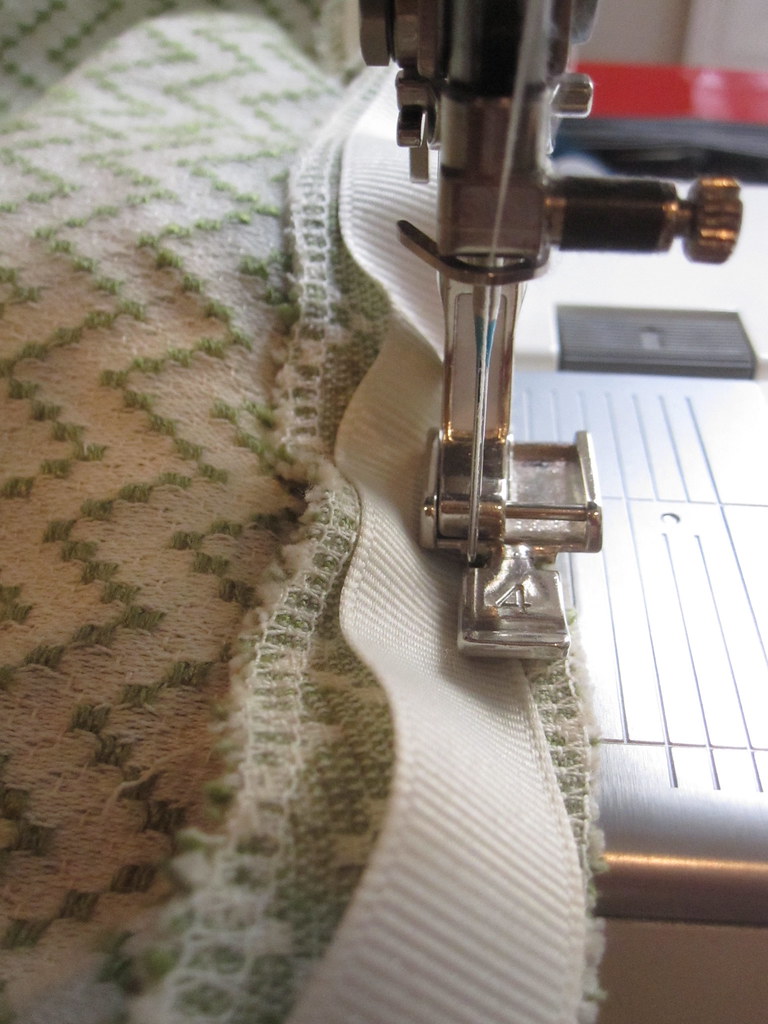
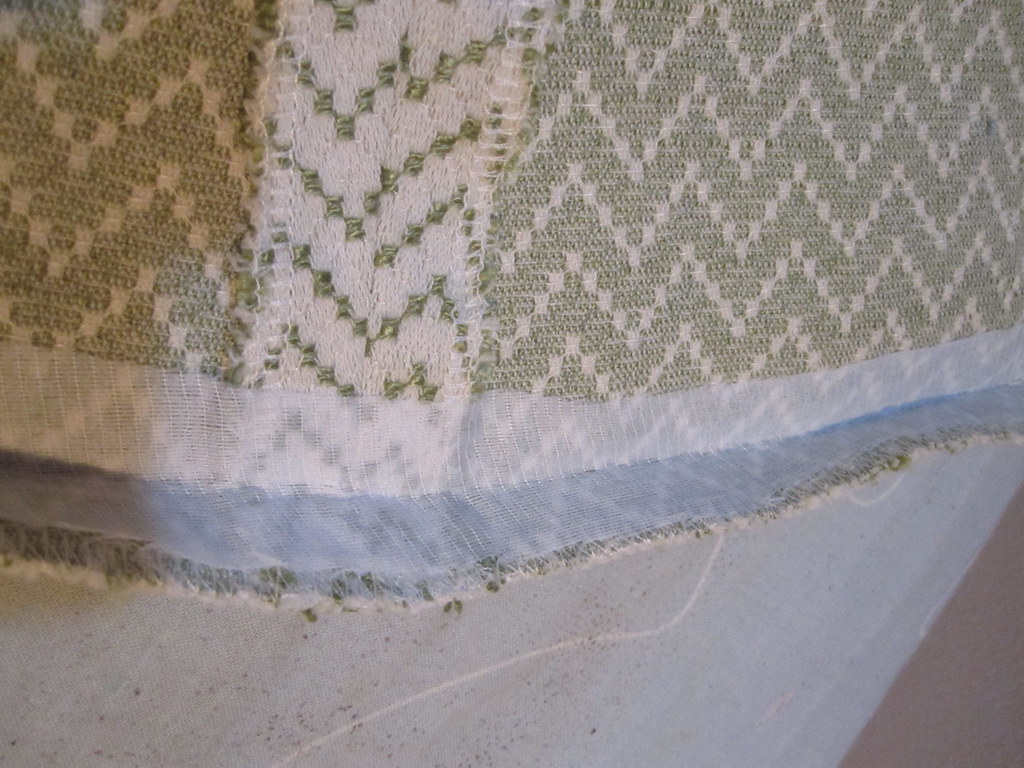
Because the fabric is not very firm, I decided to put in a waist stay. I'm not sure it needed a stay so much as just a stabilizer at the waist seam.
I used Tasia/Sewaholic's instructions for a waist stay. As you can see at left, I stitched a ribbon to the seam allowance. I had sewn the dress in front, side, and back panels so I could fit it more easily, so there are spots where the ribbon isn't sewn because the waist seam isn't continuous.
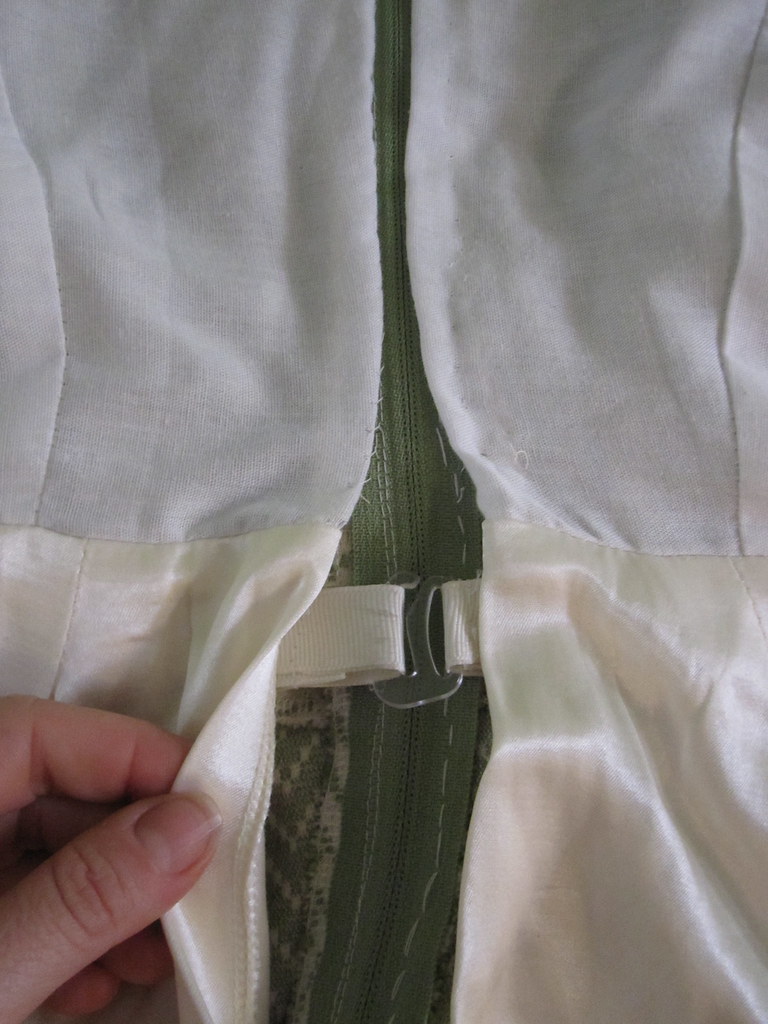
I stitched the lining to the zipper only to right above the waist seam to leave an opening for the waist stay hook. I had to cannibalize the hook from a bathing suit. Must remember to replace that next time I'm at the fabric store.
Because of fabric limitations, I shortened the dress about two inches in cutting. Even though this is a petite pattern, it is drafted quite long and I ended cutting off another two inches before hemming.
In marking my hem, I found that it was collapsing, especially at center back. So I fused a strip of medium-weight interfacing along the fold line.

I bought a bag of vintage hem lace from the thrift store a while back. The owner wore a LOT of maroon, apparently, which is a color I wear almost not at all. But there were a few other colors, including this green. I was about an inch short, but figured the gap wouldn't be too terrible.
I used a machine blind hem to stitch the hem in place. Again, it pretty much disappears into this fabric, which is the advantage of a loosely woven textile.


Here you have your choice of me trying to look cute and me apparently doing the robot. Cidell is good at finding the best/worst outtakes.
I am a big fan of this pattern. The only thing I would do differently is take out a tiny bit more length from the back bodice for a swayback. I did a small swayback, but it is a hair too long. I can definitely see making it again. It is a great A line alternative to a traditional sheath. It could be made in a fancy fabric for eveningwear, suiting fabric for work, or a printed cotton for play and look appropriate in all three contexts.
All photos are here and the pattern review is here. You can read about the muslin fitting process here and how I lined the bodice here.


Comments
Post a Comment