Simplicity 2211, TNT A Line Skirt
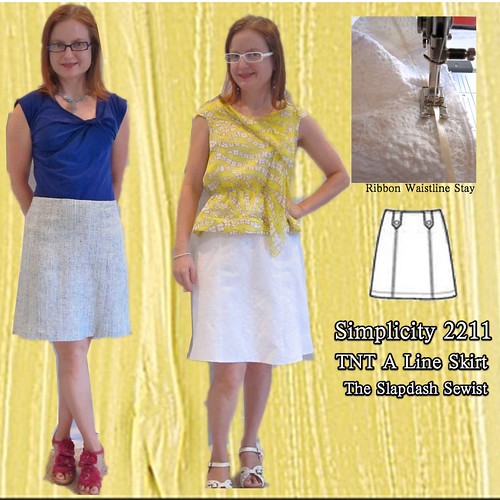
I still stand by my statement that a pencil skirt is more flattering for a pear, but a pencil skirt is awfully difficult to ride a bike in. So I accepted that I was going to need to find the perfect A line skirt. When I saw Simplicity 2211, a Lisette pattern, I thought it had promise. Darted skirts can be tricky for me because of my round belly in the front and caboose in the back. The front darts are usually too much, and the back darts are too little. The princess lines on this one take the place of darts, so there's no chance of pooching and poking and pointiness.
I've made this skirt three times already, and it got the royal treatment of being traced onto tissue paper and having interfacing fused to the back. This is an awesome way to preserve a much used pattern. As a bonus, the interfacing sticks to some kind of fabrics (does anyone else remember flannel boards?) making the cutting layout quicker because it requires fewer pins. My one real change to the pattern was to add a center back seam and move the zip there. I find an invisible zip to be tricky in a side seam because it can stick out at the end and make your hips look uneven.
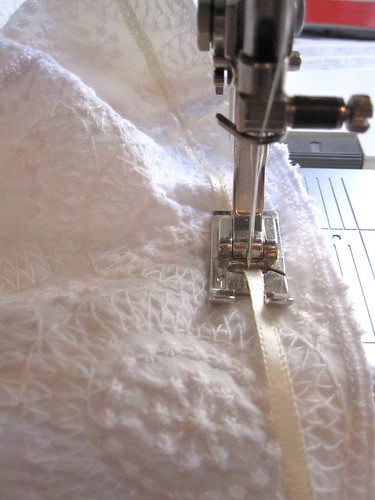
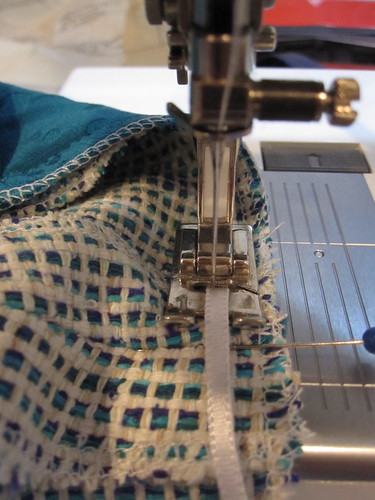 As drafted, the skirt is unlined and the waistline is finished with a ribbon. I prefer to line most of my skirts. However, the ribbon is key to keeping the waistline from stretching out. So when sewing the skirt and lining together at the waistline I run a narrow ribbon through the foot and catch it in the stitching. Apparently, I felt the need to photograph this twice.
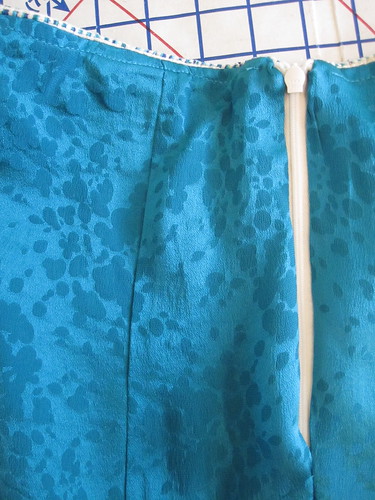
To keep the waist looking neat with no lining peeking over, for the silk version of the skirt--with a heavier fashion fabric and a lighter lining--I understitched the seam allowance to the facing.

For the white version, where the lining and fashion fabric were of about equal weight, I topstitched the waistline, catching both the fashion fabric and the lining.

For both versions, I French seamed the lining, using the selvage for the center back/zipper seam on the silk version. On the silk version, I placed the lining seams toward the fashion fabric, as per usual. However, for the white version I wanted to minimize the lining seam show-through and put the French seams toward the body.


The first version of this skirt was this disastrous white denim-ish fabric. It's not my fault that the fabric wrinkles so badly that it's unwearable. However, the terrible underlining is totally my fault. Ugh. This is why the Slapdash Sewist should not underline.
Suffice it to say, pin your underlining to your fashion fabric on a flat surface.
I am showing these photos (which are hot off the sewing machine without ever having been worn--trust me when I tell you how hideous this skirt became after a single wearing and washing) because the heavy denim shows the shape of skirt best.
I have been needing a white skirt forEVER, and finding the right fabric proved quite a trial. I broke my fabric fast and ordered some online, which turned out to be winter white. I also splurged on some white Bemberg lining. Then I found this embroidered fabric at Joann of all places. Then the Bember lining didn't add anything to the opacity so I ended up using my heavier rayon satin lining (almost gone, I should have bought more than 5 yards) in cream. Saga.

Because the fabric is somewhat sheer and the seams were going to show, I experimented with some stitch samples. I first tried the flat fell, but it was way too bulky. Then I stitched the seam as per usual, serged the seam allowances together, pressed to one side, and topstitched in place. Still a little big. Finally, I just serged the seam, pressed to the side, and topstitched. Who would have guessed that the easiest and quickest method looked the best?
Pro tip: Don't topstitch your seam allowances until you put in the zipper and fit the skirt. You might guess that I am not a pro.
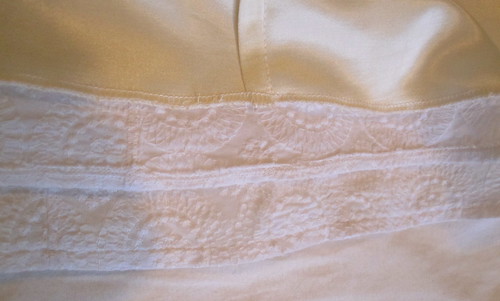
I did a similar treatment at the hemline, just serged the lower edge, turned it up once, and stitched over the serging. So easy and yet it looks so nice!
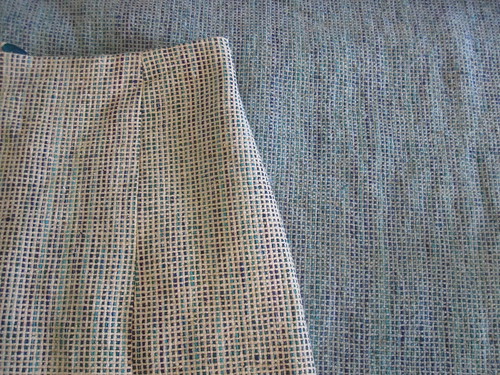
Another pro tip is to remember to pre-treat your fabric! I bought this silk suiting at PR Weekend in 2006. Yes, six years ago. The time had come! Anyway, to pre-shrink it, I saturated but did not soak it with water and hung it to dry. I noticed a couple of spots where the dye ran, but managed to cut around them. For the rest of the piece, I threw it in the washer for maximum color change and subsequent washability (the joke is on me, because the project I'm working on right now with this fabric will not be washable). The change was pretty significant.
My note to self was to be sure never to get the skirt wet. So naturally the first time I wore it I got caught in a HUGE rainstorm and ended up soaking the skirt completely through. Luckily the color didn't seem to run too much in the rain.

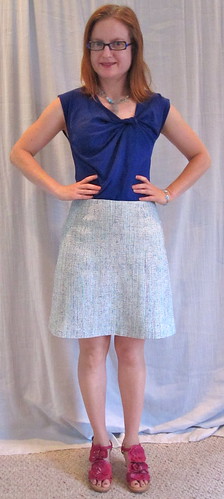
I still don't love an A line skirt, but this is a great pattern for it--enough hem width to bike in but not out of control unflattering wide.
It works better in a fabric with a little structure, and also with a shorter hemline (I may need to shorten the white one).
All photos are here and the pattern review is here.
Comments
Post a Comment