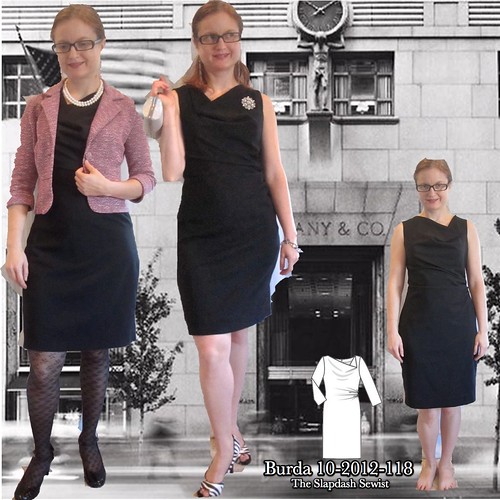
Burda 10-2012-118, Side Gather Cowl LBD
Burda 10-2012-118 (available for purchase from BurdaStyle at the link in sizes 34-42) is destined to become a Burda magazine classic. It has already been made many times, including by AllisonC, Kristy of Lower Your Presser Foot, and Sigrid, to name a few.
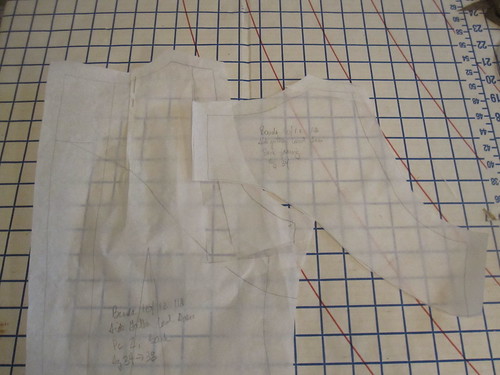
Luckily, because so many people had tested it before me, I knew I could safely ignore the marked grain--which has the cowl on straight grain and the skirt on the bias--and place the skirt on straight grain. This gives the cowl a little more drape and the skirt a firmer hand. I really don't know why Burda designed it the other way. BWOF, you are still a mystery to me!
Also, note an error in the instructions: the pattern pieces are on sheet B, not sheet A. The corresponding black-lined piece numbers on A are a pair of pants, which really confused me.
I traced my usual sizes: 34 at the shoulders and bust (and halle-freakin'-luja for a pattern that is already a 34 and doesn't have to be graded--they are getting rarer and rarer), a 36 at the waist, and between a 38 and a 40 at the hip. I cut a 38 at the hip for years but lately have sometimes needed a 40. However, for this size 39ish cut I had to shave off about 1/4" on the hips, ending at the saddlebag. This is the only area in which I find Burda's sizing inconsistent, though it is only slightly inconsistent.
The fitting adjustments I made were a swayback adjustment and a broad back. I also added a back neckline dart for my narrow neck. I did not change the bust fit--a cowl is a nice way to accommodate a variety of bust sizes. The broad back adjustment adds a bit of puffiness over the shoulder blades, and I probably could have lived without it in this sleeveless stretch garment, but eh. The sinking feeling of not being able to move my arms in a just-completed garment is much worse than some puffiness.

This stretch wool, from the Vera Wang $1.99 blowout on Fabric.com a couple years ago, is rather sheer. I debated whether to plan to wear it with a slip or to line it. For a dress this fitted, I feared that a slip would bunch underneath it and ruin the line so I decided to line. Well, then my dilemma was that I needed a lining fabric with adequate stretch. I have some stretch lining in a very light gray, which I used to the line the godet pencil skirt I previously made of this fabric, but I am really not happy with the quality. I decided to go with a fairly opaque tricot from G Street's $2.97/yd table.
My first step in creating the lining was pleating out the gathered width. I didn't want a bulky lining.
Next, as described in my review of Burda 7519, I folded over the front self-facing (very generous in this pattern, a really nice touch) and marked the bottom of it on the pattern. In this case, it was below the armscye. In cutting, I added seam allowance to the top of the front self-facing, and cut the front lining 1/4 inch above the marked line (for seam allowance).
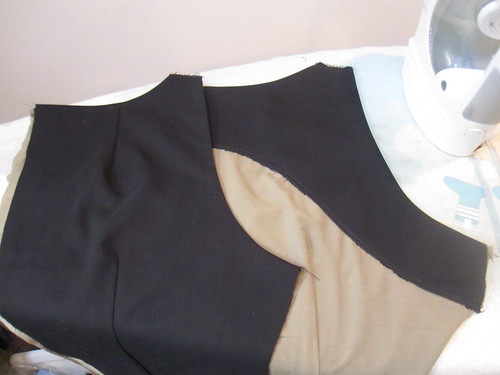
To ensure that the flesh-tone tricot would not show, I cut a back facing of the wool, fused with lightweight interfacing, and stitched it on top of the back lining. I should have been thinking about the width of the front self-facing so that the facing would look more seamless, but I like a generous facing and cut the back facing lower down the side seam than the front facing.
I interfaced the armscye of the front-self facing so I would get nice sharp lines.

Taking a nod from Carolyn, I sewed stretch lace on the bottom of my lining. Of course, I realized it would have been better to sew the black lace on the outside of the lining--the side the actually faces the public--rather than the side the faces me, just in case of show through. But I like the way it looks when it's facing me!
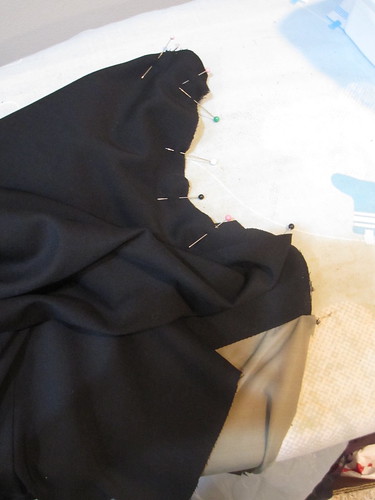
I realized too late that the neckline was a touch too wide for my taste. I solved this by taking 1/4" seam allowances at the inner shoulder rather than 1/2", though this made sewing the front to the back tricky there.
I used the same construction method as for Burda 7519, modified for the sleeveless style:
1. Finish back neckline and armscyes with the facing/lining
2. Sandwich back shoulder between front and front self-facing, stitch shoulder.
3. For a sleeveless cowl, pivot at the seamline on the shoulder and continue all the way down the bottom of the armscye.
4. Sew the lining and fashion fabric side seams, matching underarm seams.
Turn everything right side out and like magic, your dress is almost completely done! All that's left is the zipper/CB seam and the hem.
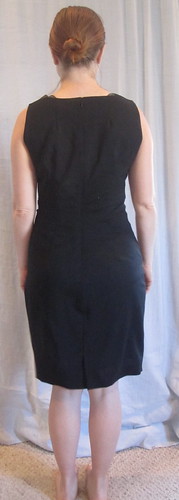

The darts are very low in the back, going almost to the fullest part of the booty. I tried shortening one of them, so I could compare them. Wrinkles appeared on the high hip in the back on the shortened side. I was neutral as to whether high-hip wrinkles were worse than slightly pointy darts. I decided to go with the pattern as drafted and the incredibly long darts. When I look at the curve I am working with here, I can forgive myself for a not-totally-perfect fit. It's just a lot of curve.
I added a walking slit so I'd have plenty of movement in the dress.

I was making this under the gun for an event and amazingly everything went pretty smoothly.
I came back from NYC and had literally 1 hour at home in which to do the hem (machine blind stitch) and little finishing bits. Luckily, it got done in time. The event's theme was "Texas" (as in the state and the University). I didn't want to be too informal, as it was to celebrate a federal judge, but I didn't want to be out of the spirit of things. A little black dress with burnt orange tights and cowboy boots seemed to strike just the right tone.


The LBD contest on Pattern Review happened to coincide with my need for an LBD, so it was nice to have double motivation to make this for my event. The rules require you to show the dress plain, with a day look, and with an evening look. My looks aren't crazy different--but in my mind, the idea of a LBD is that it can go from day to evening with just a change of earrings and shoes.
I was hoping to get outdoor photos taken but the stars (or sun?) never aligned. But there are a million photos.
I am very pleased with this dress. The fit is excellent (at least under my not-too-stringent standards) and it definitely feels sophisticated and elegant.
It took me a while to get to like the cowl. It's a shallow/narrow cowl and like the line drawing I can only get it to flop to one side, not to drape down the center as is standard for cowls. Once I accepted that, I see it more as neckline origami than as a cowl. However, it does limit necklace options. It's better with a pin than a necklace. In that sense, it may not fit the label for a classic Little Black Dress, where I think jewelry is supposed to be a big part of changing it from day to evening. But the silhouette is definitely in the spirit and I will be glad to have this little number to pull out of the closet when needed.
All photos are here and the pattern review is here.


Comments
Post a Comment