Simplicity 4047, 1950s Blouse plus Another Tweed Ride Hat


I first made this pattern in 2007 and always planned to return to it. It's a gorgeous style, and unusual.
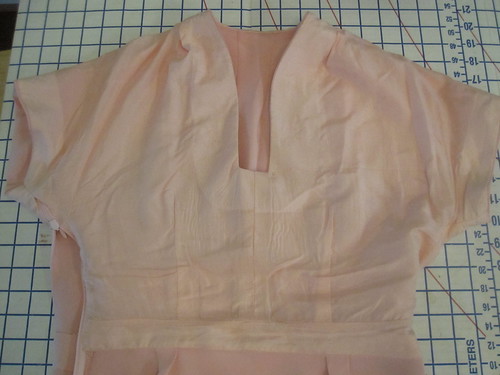
The neckline with little cut-on collar is remarkably similar to this insanely beautiful L'Wren Scott (a more brightly-lit runway shot shows two rows of decorative buttons down the front--for which I do not care--and princess seams). One thing I really like about the Simplicity neckline is that the centers have an inward curve. Very graceful.
When I pulled out the pattern pieces, I was first struck cut this out along the smallest size line. When my mom taught me to sew, she made me cut out the pattern along the largest size line, pin it to the tissue at the desired size, and then cut underneath the tissue at the desired size. I truly HATED this. Cutting is hard enough, but cutting underneath the tissue at the precisely the right spot was just horrible. So when I started buying my own patterns, I just cut them out at the right size.
Well, then came the day when I realized I likely wouldn't be the same size forever, and that perhaps it might make sense to preserve the larger sizes. Don't you hate it when your mom is right? Anyway, I just added random increments of width at the waist and hip.
The other thing was that about 1 1/2 inches of length had been folded out of the upper bodice front and back. It seemed odd, as I usually don't have to shorten above the waist due to my long torso (yes, my legs really are that short; you should see me running), but I figured I must have had a reason. 1 1/2 inches seemed way too much so I reduced it to 1 inch and went on my merry way.
Why, self of 2007? Why did you screw me like that? If anything, this could stand to have 1/2 inch of *additional* length. So I got this put together and the upper bodice was ridiculously short. The waist line is supposed to hit approximately at natural waist, and this was practically an Empire line. Why, I ask again, why?
Ugh. I found a piece of scrap large enough to cut out a waist insert 2 1/2 inches wide (including seam allowances). In the end, the waist insert is a nice design feature, but it was way more trouble than it ought to have been.
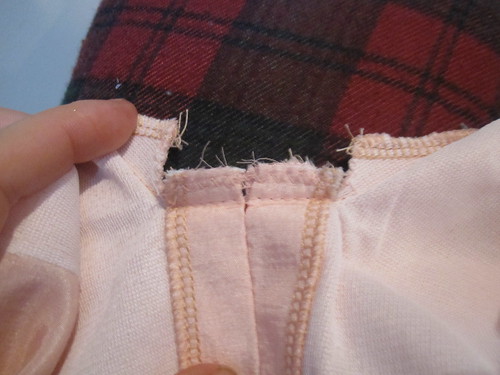
The key to the neckline is clipping all the way to the stitching at the corner, and trimming the seam allowance at the center. I am pretty happy with the sharpness. The corners are good and fairly sharp. The only issue is there is still a tiny bit of wrinkling underneath the corners.
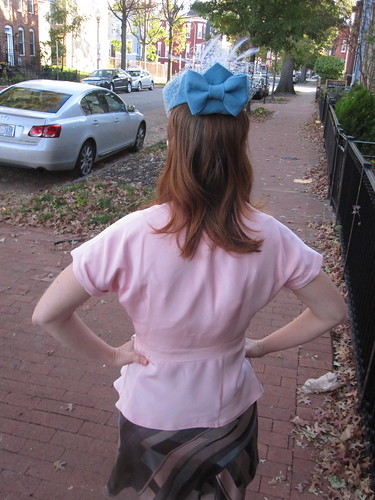
One thing I did remember from making this the first time is that I desperately needed a broad back adjustment. The first version of this was from a shreddy dupioni, and the fabric disintegrated at the darts the first time I wore it because I didn't have enough movement across the back. I did not know what I needed then, but luckily through the magic of the internet I now know how to fix the problem. I now have plenty of movement at the expense of a fairly unsightly back view where the excess ease sits when I lower my arms; I consider this a worthwhile trade.
Another thing I remembered was that the facings were horrible. This really must be lined. I lined only the upper bodice, and stitched the lining to the seam allowance at the waistline by hand.
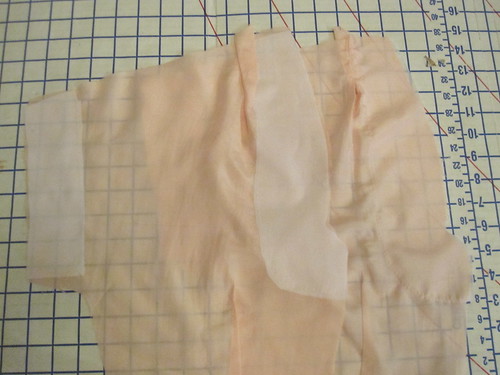
To make sure that the neckline would be crisp, I used the facing pieces to interface the edges of lining. I should not have interfaced the sleeve edge, as it is a little too stiff and the various seam allowances show through a bit. However, it worked well for the neckline. I stitched the edges of the interfacing down, so that if the glue unadheres the interfacing won't flap around inside.
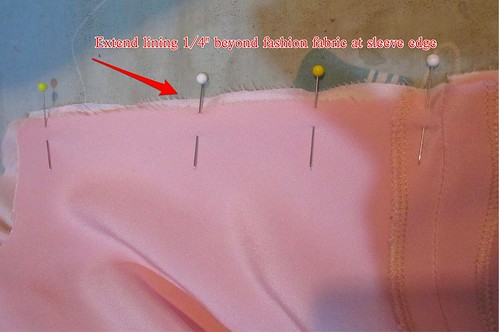

To get a nice turn of cloth at the armscye, I pinned the lining 1/8" beyond the fashion fabric when I was sewing them. When the lining was turned to the inside, that pulled the fashion fabric in so there is no chance of the lining showing.
This blouse falls toward the back at the shoulders, which is not a common problem for me. I have to shrug it up toward the front to get the shoulder seam to run along the shoulder ridge before I can move my arms. Is this a function of the dolman sleeve? If I were to consider fixing this in the pattern, would I just move some fabric to the front from the back, or would I affirmatively add more to the front? Wisdom and suggestions appreciated. I think I would like to draft this into a regular armscye so I could make a sleeved top or dress from the pattern.

The skirt I'm wearing it with had a really dated handkerchief hem. This was during the PR Refashion contest and the fabric is a really lovely silk (purchased at H&M if you can believe, about 7 or 8 years ago). I was thinking of making it into a tank. It was going to be tricky because the skirt is bias cut. But then I realized it would be much easier (and likely more successful) to just change the ugly hemline. Ta da! New skirt.
I bought this blush silk crepe many years ago, I don't remember exactly from where (FFC?) and how much I paid. I let it lie fallow for many years because I thought I couldn't wear this color--too close to my skin tone. However, I suddenly decided that it was the perfect color for me and I had to make the blouse immediately. I don't know why. I do like the color; it works a lot better for me than I thought it would.
All photos are here and the pattern review is here.
=========================
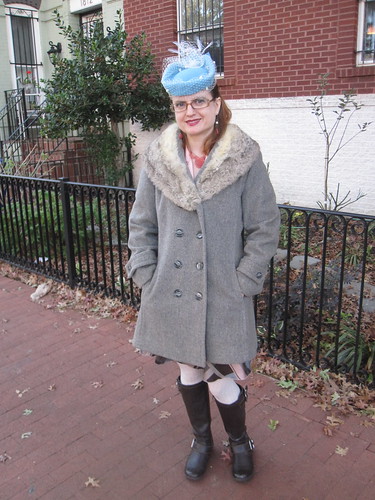
This was my costume change for the Tweed Ride. I also wore my Nana's fur collar coat, which I'd never worn. Even though I had nothing to do with the fur, I just can't bring myself to wear it. It is a beautiful coat, though, and it fits me so well!
The main point of the costume change was to wear the other hat I made! This one I blocked from a length of wool felt. As sewists, we know how awesome it is to go from a flat piece of fabric to a 3D garment. It was very cool to do this in a new way.
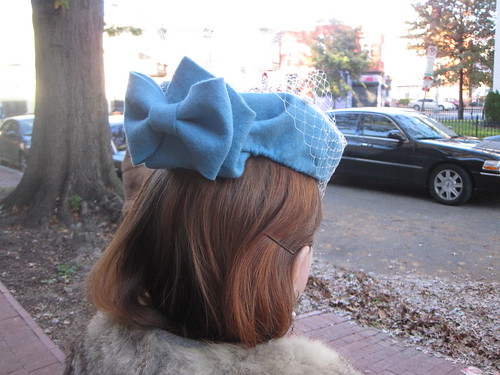
I gleaned most of my information from this video, and then just sort of made up the rest. I cut off three of the square edges and used the fourth one to fold into a kind of origami back piece, accented with a faux bow.
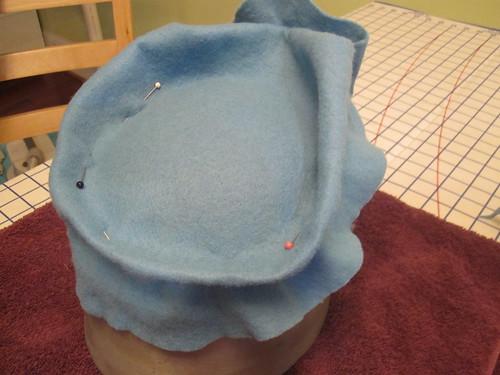
Here it is after I spent a lot of time stretching the felt around the head form to give it a conical shape, and then the initial blocking. I was just making up the shape as I went along.

I hand stitched the wire in place to help it keep its shape (felt stiffener is really what ensures it stays in shape).
Because I don't have a hat form suitable for blocking, I just had to use my head form. The edge is pretty ugly--not at all smooth--because I couldn't stretch the wool underneath a block. I didn't have any matching ribbon to wrap around the edge and cover the ugliness.
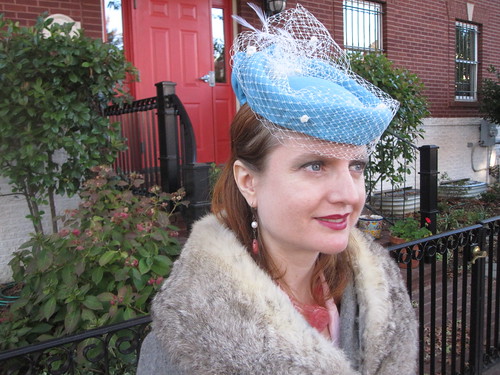
But I really don't care--I am over the moon about this hat!
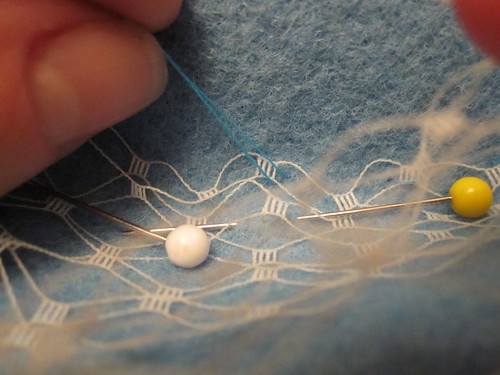
I've wanted a hat with netting my whole life , for some reason, and this one was well-suited to it. I don't know how you're actually supposed to attach netting, but I did it with tiny hand stitches anchoring it in place, as demonstrated in the photo. You can see completed stitches here.
Millinery photos are here, along with some closeups of the houndstooth hat.


Comments
Post a Comment