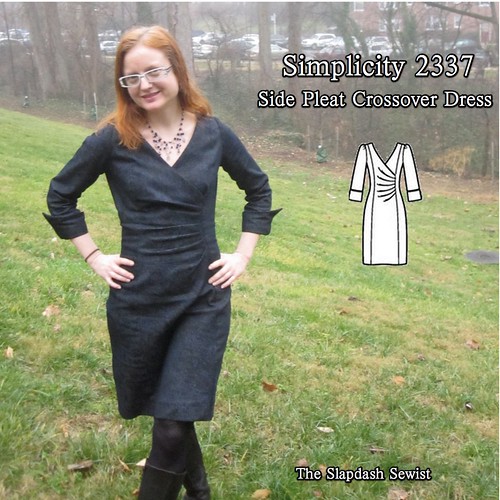
Simplicity 2337, Side Gather Princess Seam Crossover Dress
 |
| Trina Turk Ruched Ponte Dress, $328 |
This look is fairly popular in RTW, and I've made a couple of pieces with these side pleats, notably my red Simplicity 2053 (and Butterick 5672 in a knit). However, in past projects the pleats have not quite worked, being too poofy over the stomach and emphasizing rather than disguising it. Simplicity 2337's pleats are contained by the princess seams, so they do not radiate over the entire front of the dress. It turns out that is the key to wearing this style for me. When they are the entire width of the front there is too much room for them to open up over the belly. Over a narrower area, they are contained and stay put.

I wasn't sure if the denim would end up looking dated, but this collection of denim dresses convinced me otherwise.
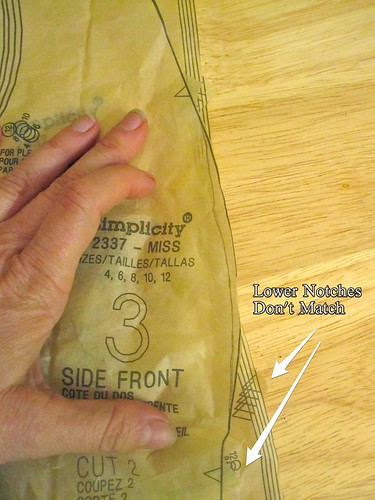
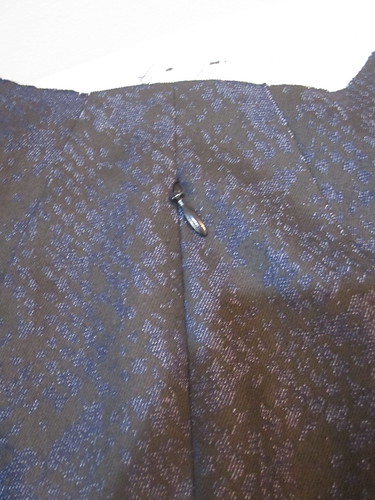
There is a printing error on the pattern. What appears to be the lower bust-matching notch on the side front is actually the position of the small dot, which indicates where the crossover front edge is matched. The lower bust-matching notch is just missing. However, I didn't have any trouble getting the bust right (which is partly due to my small bust adjustment--you can see the pencil marking where I shaved off some width).
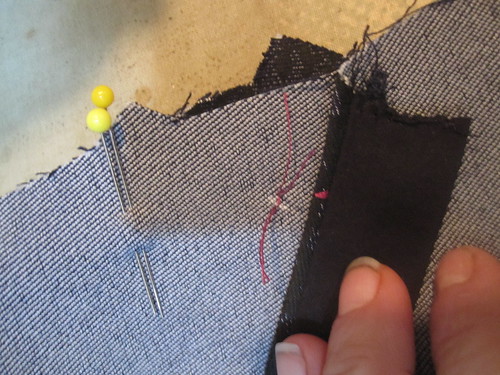
I used tailor's tacks to mark the joining point for the crossover at the front princess seams. The matchup was easier than I expected it to be and didn't require any fussing or adjustments.
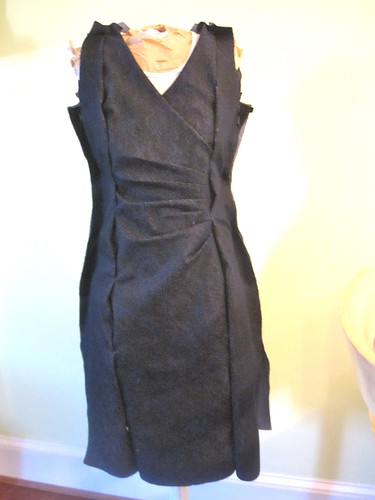
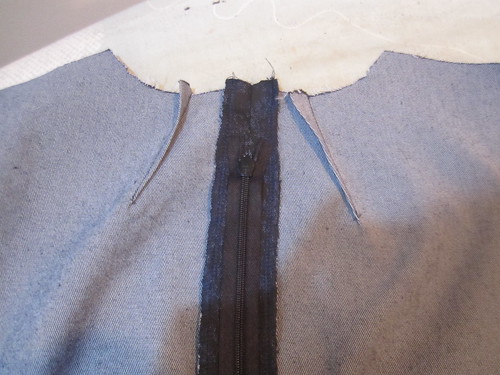
I normally fit as I go, but this dress was tricky. The neckline has to be finished before the front princess seams can be sewn, because the finished neckline is caught into the seam.
This sort of negates the purpose of princess seams, which are so great for fitting. So I had to actually pre-check the fit before sewing together. *gasp*
I pinned it together and I determined that other than a gaping back neckline, the fit was close enough that any final adjustments could be made at the side seams. I ended up taking it in quite a bit at the waist and a little at the hips, but in the end the fit is really great.
Before cutting, I did the small bust adjustment by shaving off some curve on the side front bust and shortening the front crossover by about 3/4 of an inch. I did a broad back adjustment and, as mentioned, I added neck darts to deal with the gapey back neck.

Because I was sewing with a fairly beefy denim (purchased in NYC when I went there in November--I have a lot of confessing to do), I used bias tape finish to the neckline rather than a facing, which would have been very bulky.
This pattern's one downside is that it would be very difficult to line in the front crossover version, The front neckline must be finished before the princess seams are sewn, and the finished neckline is sewn into the seam. Therefore, the lining would have to be caught up in the front princess seam, at least for some distance. So you have a lining that is either not free floating and could distort your fashion fabric in wearing, or a very ugly inside. I think the best solution would be an underlining.
I have been really dissatisfied with the tops of my invisible zippers lately. I cannot get a nice straight-across look for the life of me. Since the neckline here is large enough to pull over my head, I installed the zipper a few inches below the neckline, closed the neckline up above the zipper, and then finished it with the bias tape. Apparently, this has been a chronic problem because I wore my double-faced wool Burda 10-2011-123 wrap dress the other day and realized I'd done that zipper/neckline the same way, presumably for the same reason.
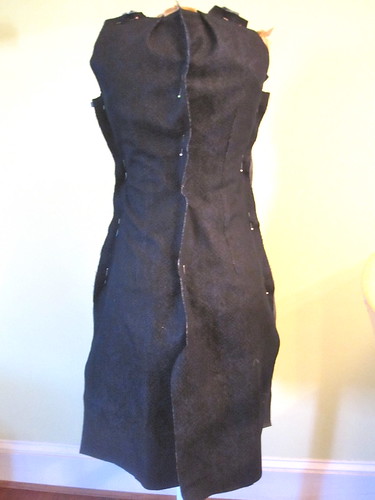
I really need to give up on backs without a waist seam. A waist seam will be less noticeable than wrinkling, I think, even if it seems somewhat weird. This is with a very generous swayback adjustment, btw.

The pleats are not quite in the place I need them; it would be great if they were moved down by one. I'm not sure if I will undertake that or not. Or perhaps the fact that the pleats aren't over the tummy is why this looks good?
This was supposed to be a closeup of the cuff, which I took from vintage Simplicity 6110. You can sort of see it.

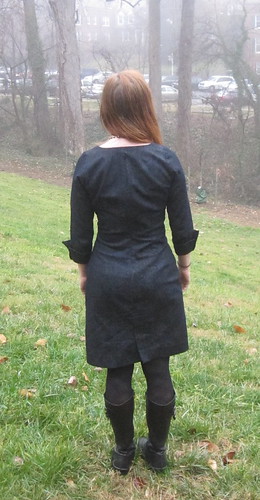
We were having an unusual fog when these photos were taken. DC's reputation is that we are living on a swamp, but we really don't get fog that often, and certainly not all day fog. So the lighting is weird and I feel emphasizes the wrinkling of the denim.
I know it sounds like a cop-out to say the dress looks better in person than in photos, but trust me, this dress is DYNAMITE in person. When I finished my first thought was, "OMG, I can't wait to make another one of these!" Perhaps my splurge Julie's Pick fuschia wool fabric from Fabric Mart?
All photos are here and the pattern review is here.


Comments
Post a Comment