Variations on a Tee # 5: Lace Tee with Contrast Shoulder
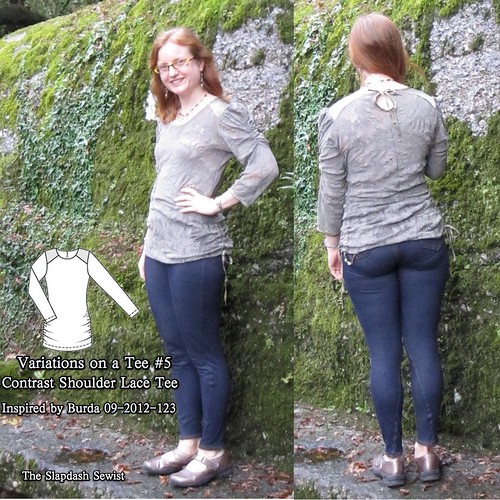

I found this stretch lace on the $2.97/yd table at G Street Fabrics a while back and had been puzzling over what to make it into. With lace being in style right now I wanted to make it up fairly quickly, but the somewhat blah color and the fact that it would either have to be lined or worn with a camisole was cramping my creativity.
Enter Burda 09-2012-123 with its contrast shoulder and the fact that I had this silk charmeuse in an exactly matching color and voila! Perfect long top to go with my jeggings. I got this made in my pre-vacation sewing. The photos were taken on Mt. Penha in Guimaraes, Portugal.
The contrast shoulder is a nice way to dress up a plain tee, as in this Classiques Entier® 'Pezza' Leather Trim Ponte Top, $168.

I used the Burda pattern as a guide to mark the contrast shoulder on my TNT tee pattern. I pinned the front and back pattern together along the stitching line at the shoulder, and then drafted the shoulder inset as a single piece.
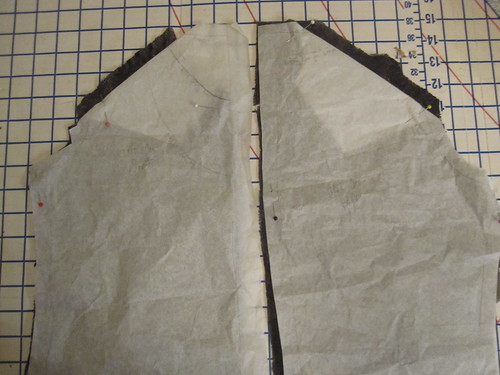
To cut the body of the tee shirt, I just folded down at my marking and added seam allowance.
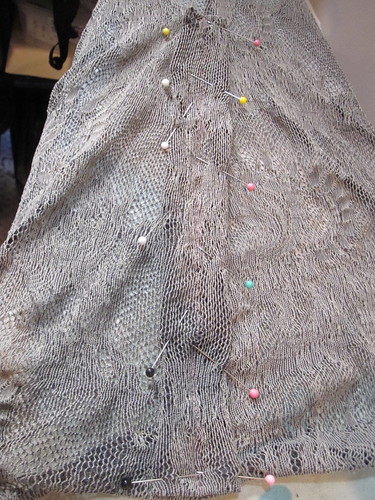
I wanted to make the tee long to be worn with the jeggings, but I liked the idea of an adjustable length with ruched sides, rather than just gathering the side seam and permanently fixing the length. I cut a rectangle of fabric the length I wanted, and 2 1/2 inches wide. I marked down the center of the fabric, as this line would be stitched for a channel. I started by sewing the marked center channel line down, starting from about 1 inch from the top and folding under the seam allowance at the bottom.
Then I turned under the seam allowances on the top and the long sides and stitched down the long sides. Be sure to leave the top open at this point so you can put in your drawstring! Once the drawstring is in, stitch along the top, being careful not to catch the drawstring.
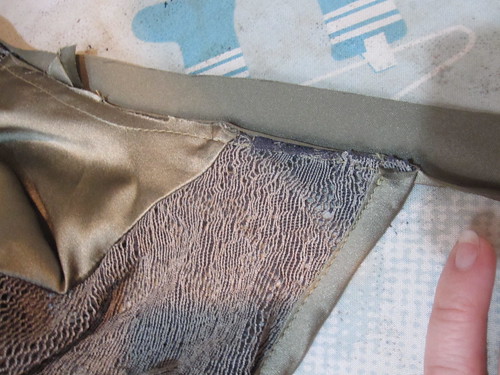
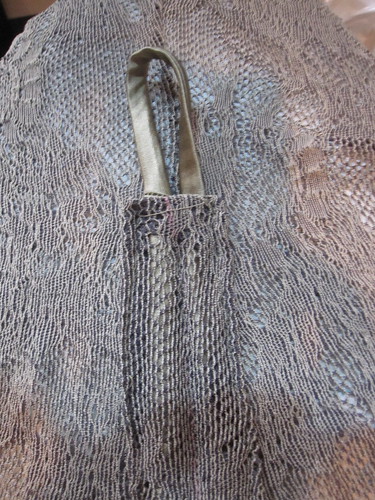
The Burda is drafted with a keyhole neckline and tie in the back. Since my TNT pattern has a center back seam anyway, I decided to keep that detail. I started by finishing the keyhole, then moving on to the neckline.

I made bias tape from my contrast silk charmeuse and first sewed it to the inside of the neckline, right side of the bias tape against wrong side of the fabric. The bias tape extended at the end to form the tie.
Then I folded the bias tape over to the right side, pinned, and stitched. I did a *ton* of pressing on the neckline and it still doesn't sit quite right. Maybe I didn't cut my strip exactly on the bias? Regardless, it's something that I think only I will notice.
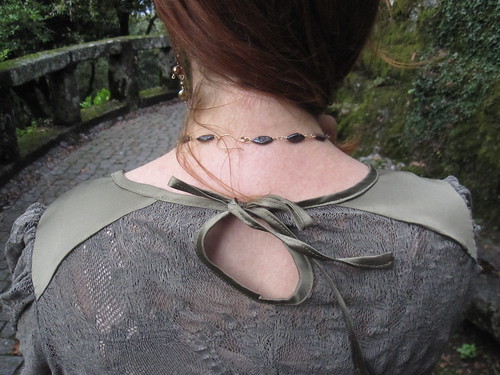
The back keyhole is a nice little touch, and helps bring the contrast silk more into the tee.

To add a little more interest to this top, I used the sleeve from Butterick 5562, the short sleeve from View A, which is much nicer than the similar but not identical long sleeve from View B.
This was a fun use of my stretch lace, and I thought it made a nice travel piece. It is cute and trendy, and--most important--doesn't look like work clothes! If I find the right combination of fabrics I can definitely see making another of these contrast shoulder tees, though probably without the keyhole and the fancy sleeve.
All photos are here and the pattern review is here.


Comments
Post a Comment