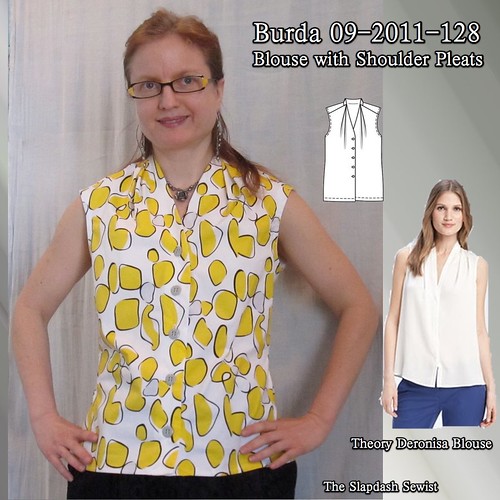
Burda 09-2011-128, Theory Deronisa Blouse

I don't wear too many blouses, and I'm not sure why. I think part of it is that a very traditional collar-with-stand blouse just isn't interesting enough for me! It makes me feel too cookie-cutter lawyer-y (even though none of my co-workers dress like that either).
However, Burda publishes some interesting variations on the theme, including this Burda 09-2011-128. I don't know that it struck me at the time, but when I was doing some snoop shopping last year I ran across the Theory "Deronisa" blouse, $200 and available in various colors. I remembered this pattern and could see the possibilities in it more.
This was sort of a wearable muslin--made with fabric from Robin's swap party!--intended to see if the pattern would be nice for a silk with long sleeves (redrafting the shoulder to remove the extension. I think it will work, though it is (mostly) past long sleeve weather so it will probably be a project for next Fall.
My main alteration to this was to add a CB seam and back darts. It would otherwise be fairly shapeless, though to give Burda credit the Deronisa blouse is rather shapeless as well. I used my basic woven pullover top to get the shape of the back seam and the darts. Makes life so easy!
I did not do anything for an SBA. I thought I might end up needing to narrow the front pleats, but I don't feel that this is excessively large over the bust.
Made by Evyline did an excellent photo tutorial on the unusual collar construction. I won't repeat her work--definitely check it out if you plan to make this.
Just to pique your interest, the collar is in the back only. The front extends past the back bodice, drafted in a length to meet the collar, so the blouse is a consistent height from the front to the back. I think it's a great way to get the extra formality/crispness of a collar without being too much. The front darts are rotated into the neckline pleats.
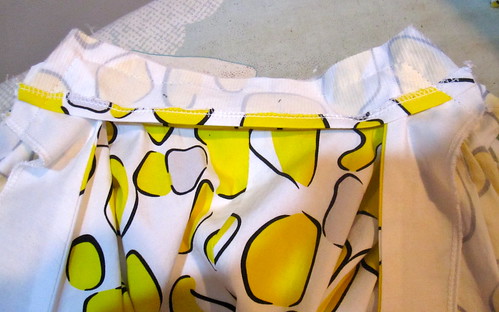
You first stitch the outer collar in place, then finish it by stitching the inner collar over it. Be sure to fold under the seam allowance of the inner collar before pinning it in place so it will be neatly tucked under when turned to the inside.
You can see that rather than radically trim the side seam of the collar, I left it pretty wide and focused on turning it inward to create a neat corner. I find that when I clip very close to the seams on collars, it is actually harder for me to get a sharp point than if I clip the long edge close and leave the short edge longer and concentrate on folding the SA in and pressing in place.
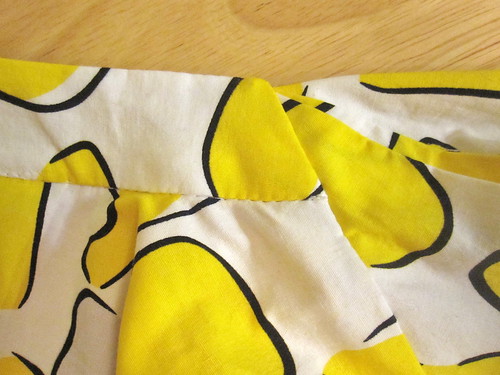
Here's what the collar looks like on the outside when it's finished. Feel free to observe my truly horrendous attempt at stitching in the ditch. I never stitch in the ditch; this is why. Next time I would probably either topstitch, or more likely hand stitch the inner collar to the SA.
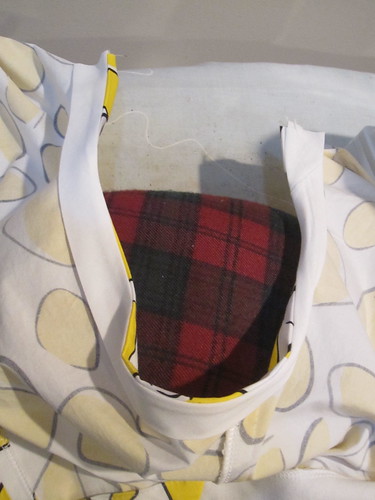
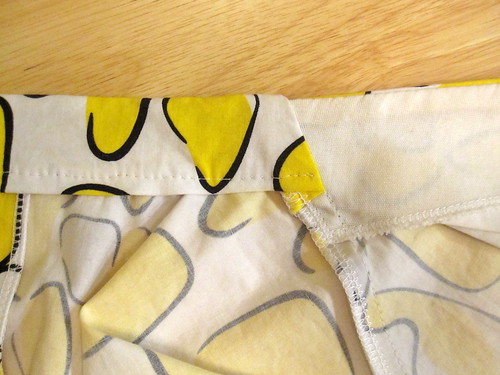
I finished the armscyes with bias tape before sewing the side seams, mostly because I am really lazy about measuring bias tape and the opening it's meant to finish to get an exact length. I don't know that this was the best method; at the very least, I should have extended the bias tape 1/2 inch beyond the edge of the fashion fabric on each end.
My house made (to pretend that we are at a fancy bistro) bias tape is too wide. I may need to go in and trim it, leaving a raw edge because it folds under on itself and threatens to show.
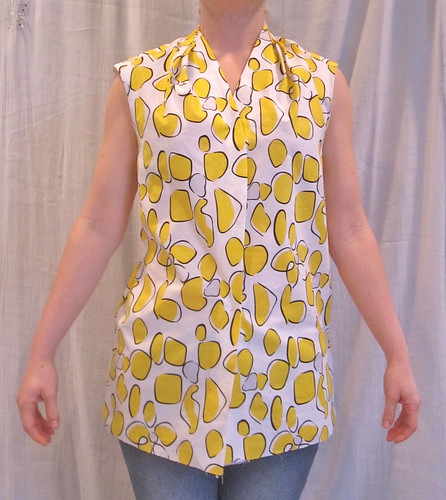
It is drafted CRAZY long. There is also a dress length for this pattern. There is no indication the shirt is meant to be a tunic but that's about the length they have marked for the blouse hem. I ended up shortening it by 5 inches.


I keep talking about all the sloppy things I did in making this (and while we're on the subject, the hem is totally crooked), but actually for the most part I think it is quite well done, if I do say so myself. The pleats came out sharp, and the front facing finish is crisp. The corners of the collar are not *perfectly* flush with the front, but pretty darn close.
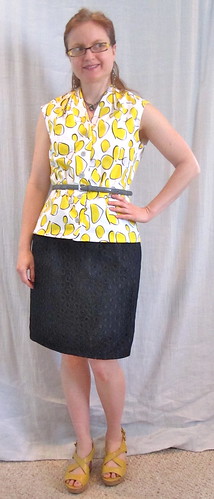
I like the blouse a lot, but I'm not crazy about the shape of the armscye. It just sits a little weird. I don't know how much of that is related to my extra-wide bias tape and crisp fabric, though. I am definitely interested in making the pattern again.
I've paired it here the my Burda 09-2008-108 skirt, in wool with a lace overlay.
All photos are here and the pattern review is here.


Comments
Post a Comment