Retro Striped Bikini, McCall 5400 and Burda 01-2012-128
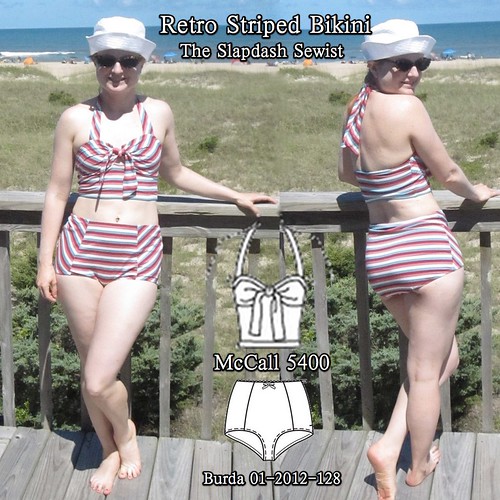
Burda 01-2012-127/128 bottoms, McCall 5400 View E top. I got the striped fabric from G Street's $2.97/yd table in February 2012. I assumed it was a polyester knit, but after I'd already cut the whole thing out, taking extra special care with all the stripes, I wet a scrap to make sure it would be opaque with my mesh lining. And then when it got all papery and stiff I realized it was rayon. Ugggghhhh. It was too late, though, and I didn't have anything else in stash suitable anyway. I using the lining as underlining to help the pieces keep their shape and it held up ok...for one wear. The bottoms are already pilled. I'm glad I considered this a muslin all along. At least I moved 1 1/4 yards out of stash.
 |
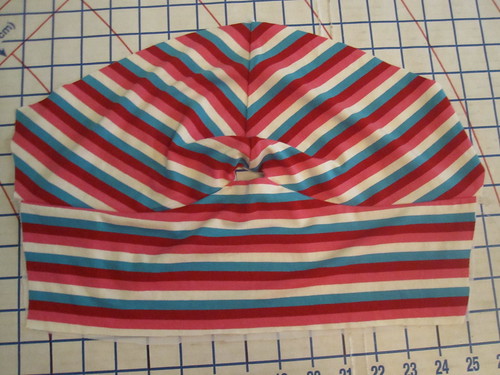
| Top: right side out; Bottom: right sides together |
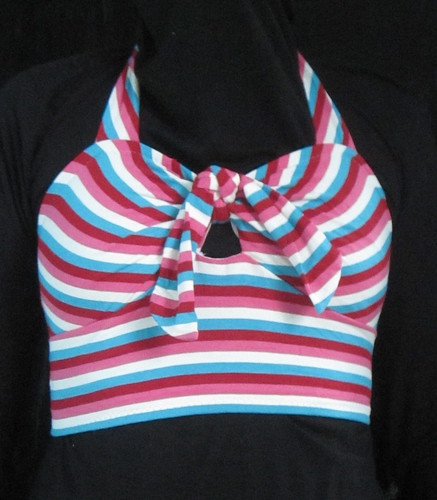
One of the features I really love about the top is the keyhole opening between the upper and lower front bodice. McCall's directions have you sew the fashion fabric and the lining separately, sew them together at the top, and then turn under the seam allowances at the keyhole opening and stitch in place by hand. I underlined, rather than do a regular lining.
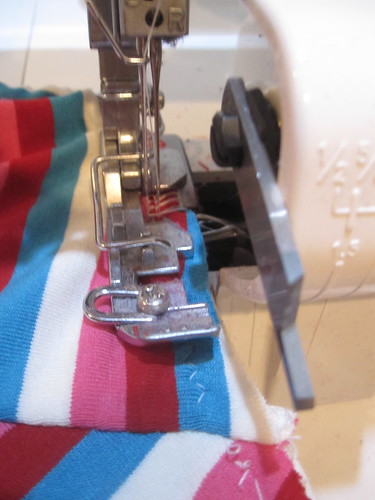
Since I thought hand stitching wouldn't look great there, I started by clipping into the seam allowance on either side of the keyhole opening and sewing the lining and fashion fabric right sides together between the clips.
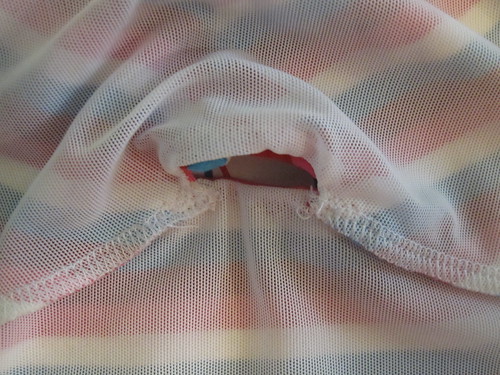
Then I sewed the upper bodice and lower bodice together, treating fashion fabric and lining as one. I used my serger for this, and was careful to get the seam allowance exactly right at the clip so the two lines of stitching would line up.
Then I turned the seam allowance down, and tacked it to the lining only (which was still open at the bottom, so I could easily separate the two layers) on either side of the keyhole opening to keep it from showing.
This makes for a nice tidy opening. Note that the opening in the upper bodice is longer than in the lower bodice, so markings are important. The ruched effect on the upper bodice is accomplished by pulling the tie through the keyhole and over the upper edge and knotting it.
The upper front bodice is drafted to be cut on the fold, but because I wanted the chevron effect of the stripes I cut it with a center front seam.
The top pattern is drafted with a narrow halter strap that is stitched on either side of the front, i.e., not adjustable. Several reviewers mentioned that the strap was (1) skimpy, and (2) too long. Rather than mess with all that, I used the pattern for the center front tie to cut straps as well. After comparing the length with straps on a RTW halter top I had, it turned out to be pretty much the same size.
The tie is drafted as a rectangle, but I angled the ends on both the bust tie and the halter ties. I cut the halter ties on the bias for another chevron effect. I gathered them slightly before attaching to the upper bodice, right sides together. The tie's raw edge was later covered by the elastic and turned under.
My top is quite a bit shorter than drafted--more of a midi top than a tankini.
===========
The bottoms are available in 34-42. I would normally cut a 38 for the hip, but this was drafted for a stretch woven (with a side zip!) and I was using a knit. I went for the 34 with generous seam allowances in case I needed more room. That turned out to be the perfect size, so I recommend going down two sizes if you make this pattern in a knit.
My other concern was that the crotch would be too narrow at the front, as the illustration shows it to be rather skinny. In fact, it has the opposite problem, a bit of scrunchy fabric for the toe-of-the-camel look. I will shave off a teeny bit of width when I make this again, but only a touch because I'd rather have scrunched fabric than inadequate coverage.
The concern I didn't think of was that with the bottoms being so high waisted I really needed a swayback adjustment! I had to do one after the fact by just shaving some length off the back of the panties from the waist, but that was only a makeshift solution. For a really good fit, I would need a center back seam, but I think that would be more distracting than a little swayback bunching, so I will just take the length out a few inches below the upper edge and take some width off the back's side seams.
I have very little to say about construction of the bottoms, they were really easy and went together with no problems! To finish the edges (waist, legs, lower edge of top) I first zigzagged elastic in place. Before elastic, the back of the leg opening was rather gapey and slack. My first try I stretched the elastic to 95%+ on the back, with no stretch along the front leg. That was too tight so I picked it out and stretched the elastic to about 80% on the back. I can live with this but I think it is still slightly tighter than needed. Next time I will do 70-75%. Next time I will also be sewing with proper swimsuit fabric with good recovery, which will help too.
After the elastic was in place, I serged it in place with the knife lifted so I didn't accidentally cut into the elastic. This was purely for aesthetics. What can I say, I like things to look nice on the inside! Then I turned it under and zigzagged in place. I'm really not crazy about how homemade-y the zigzagging on the outside looks, but it is not noticeable from more than two feet away, so I will just stick with that method.
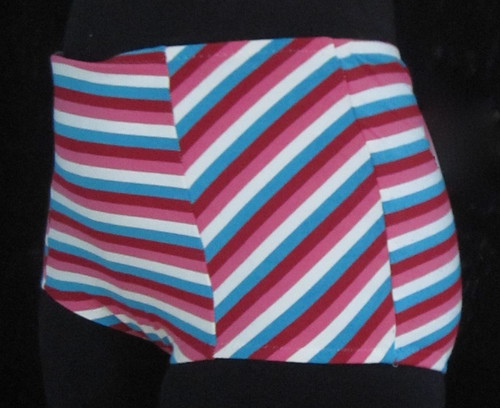 |
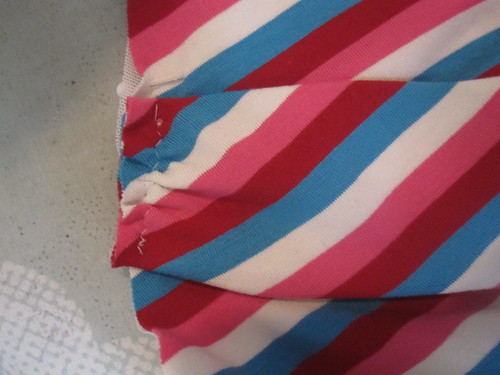
| I'm so annoyed I didn't notice the front waist was turned under! |
I couldn't get perfect stripe matching on the bottoms because of the curves of the seams. I am sure a print-matching master like Amanda S. could have worked some magic on them, but it is beyond my skill level. However, some of the stripes match and that's good enough for me!
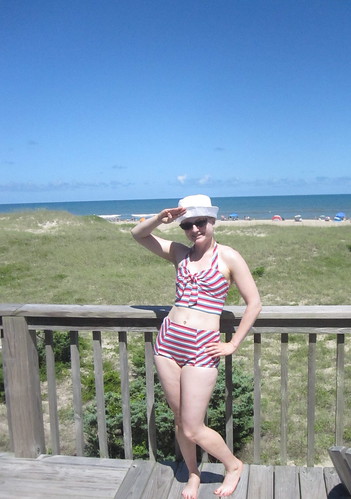
I had another trip to the beach, this time to the Outer Banks of North Carolina, so of course I needed a new suit. I was curious to try the high-waisted trend and see how it would work for me. I was afraid that it might emphasize my round belly but in fact it is either neutral or actively flattering to that sensitive area, much to my great surprise. I'll take it!
I felt adorable in this suit, and my photographer obliged with lots of photos on the deck of the awesome beach house (this was another family event, and they rented the beach house and invited us as guests--score!). I had never been to the OBX and was suspicious that it couldn't be as awesome as everyone always said. Well, I loved it! The water is not dirty or too cold, the waves are very mild, the beaches are smooth and sandy, and with the sea breeze it was not too hot and humid at all. I could definitely see staying there for a week someday; we were just there for a very brief "long" weekend (one afternoon and one full day).
I ordered some real swimsuit fabric for another of these and a Bombshell (yes, I am a lemming). I am planning a vacation in September that will include beaches (I hope) so these projects can't languish for too long...
The bottoms are reviewed here, the top is reviewed here, and all photos are here.
Comments
Post a Comment