Variations on a Tee #7: Raglan T-Shirt Dress

 |
| BCBG Max Azria Pre-Fall 2013 |
Clio pinned the Max Azria on the left sometime last year and I immediately loved it. She has shown her awesome raglan tee so I figured I should get around to showing mine (which I made several months ago--hence the three different sets of photos!).
 |
| Michael Kors, $1695 |
I dig the bare front cutout in the Max Azria, but for my real life sheer sleeves like the Michael Kors on the right are more doable. I would not wear this dress to work, but it is the perfect LBD for winter parties.
The body fabric is a heavy poly/lycra knit I got on eBay several years ago from a seller that has, unfortunately, stopped selling (Uptown Fabrics
Since I already have a perfect t-shirt pattern, I decided it would be easier to draft it into a raglan than the start with a raglan pattern and alter it.
House of Jo posted some great instructions for how to draft a raglan sleeve from a bodice block. Visit the link for full details; here is a cursory overview of the process.

Start by marking the raglan line on your bodice. Can you spot my stupid mistake here? Yep, I only drew my line into the shoulder, rather than the actual neckline. I got pretty far into the drafting process before I realized it. I went back and did it right, but didn't take new pictures so these will have to suffice. I used Kadiddlehopper's trick of using Frixion pens to make the markings on my pattern and just ironed them away when I was done. Brilliant! I've been using Frixion pens to mark my fabrics for a while, but it never occurred to me to use them on patterns.
Then you pin the bodice onto the sleeve, matching the notches, and matching the seamlines as well as you can.
 Trace your bodice markings, including the dart at the top. The dart is what gives the sleeve shape, and is the reason I wanted to use my TNT pattern. I have narrow shoulders, and on commercial raglan patterns the "shoulder" extends far from my actual shoulder and creates an ugly bump. The dart placement on my drafted pattern is absolutely perfect; it required no tweaking whatsoever.
From that point you remove the bodice pieces and trace the underarm curve of the sleeve and you've got yourself a pattern. It's surprisingly easy once you untangle the instructions (my lack of spatial relations is painful for drafting purposes).
There was no magic to the construction here, it's just a simple t-shirt dress, but I did want to show how I do foldover elastic ("FOE") when I'm being fastidious. First you cut the FOE to about 75%-90% of your neckline opening, on the lower end of the scale for loose weave fabrics with little recovery and the higher end for firmer knits with a lot of lycra. I did about 90% for this fabric.
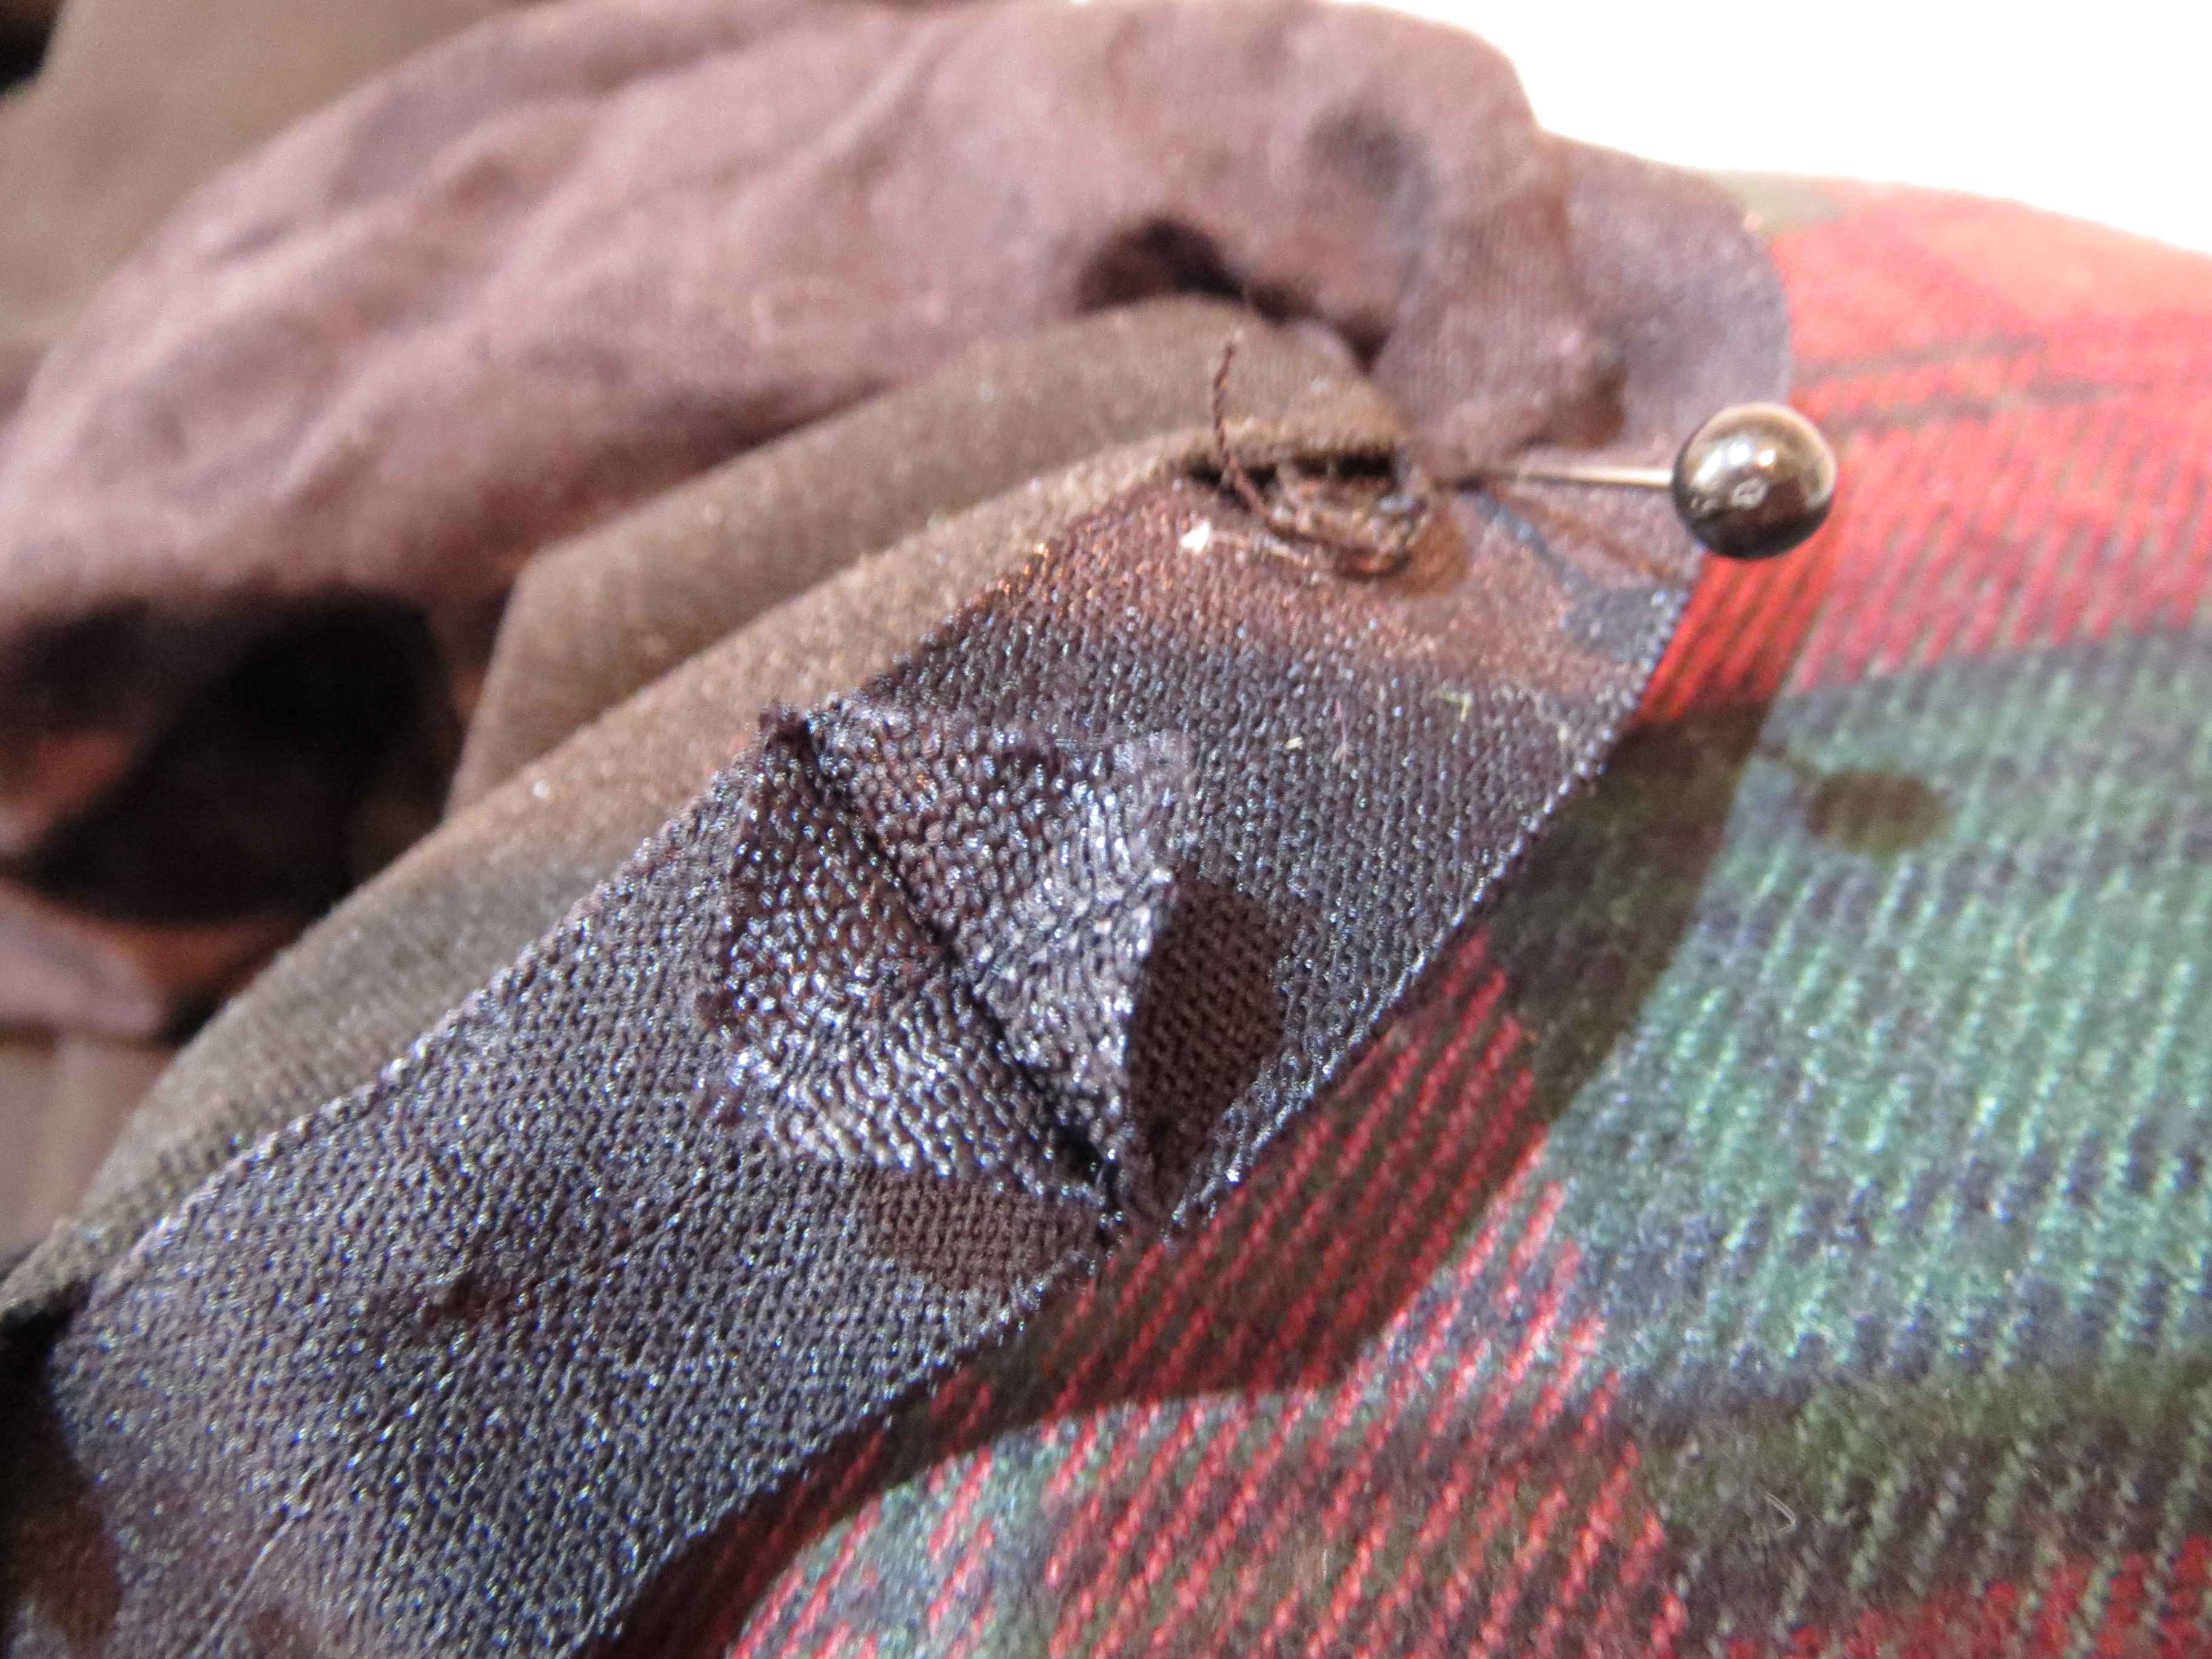
Stitch the ends of the FOE together, right sides together. The key here is to clip the corners of the FOE in the seam allowance, as shown. Otherwise, those ugly ends poke down below your stitch line. I use fray-check on the cut ends, but I am paranoid.

Next it's a two-step process. Zigzag the wrong side of the FOE to the wrong side of your neckline. The white marking here is my center front; for my V-neck dress this was necessary for a later step.
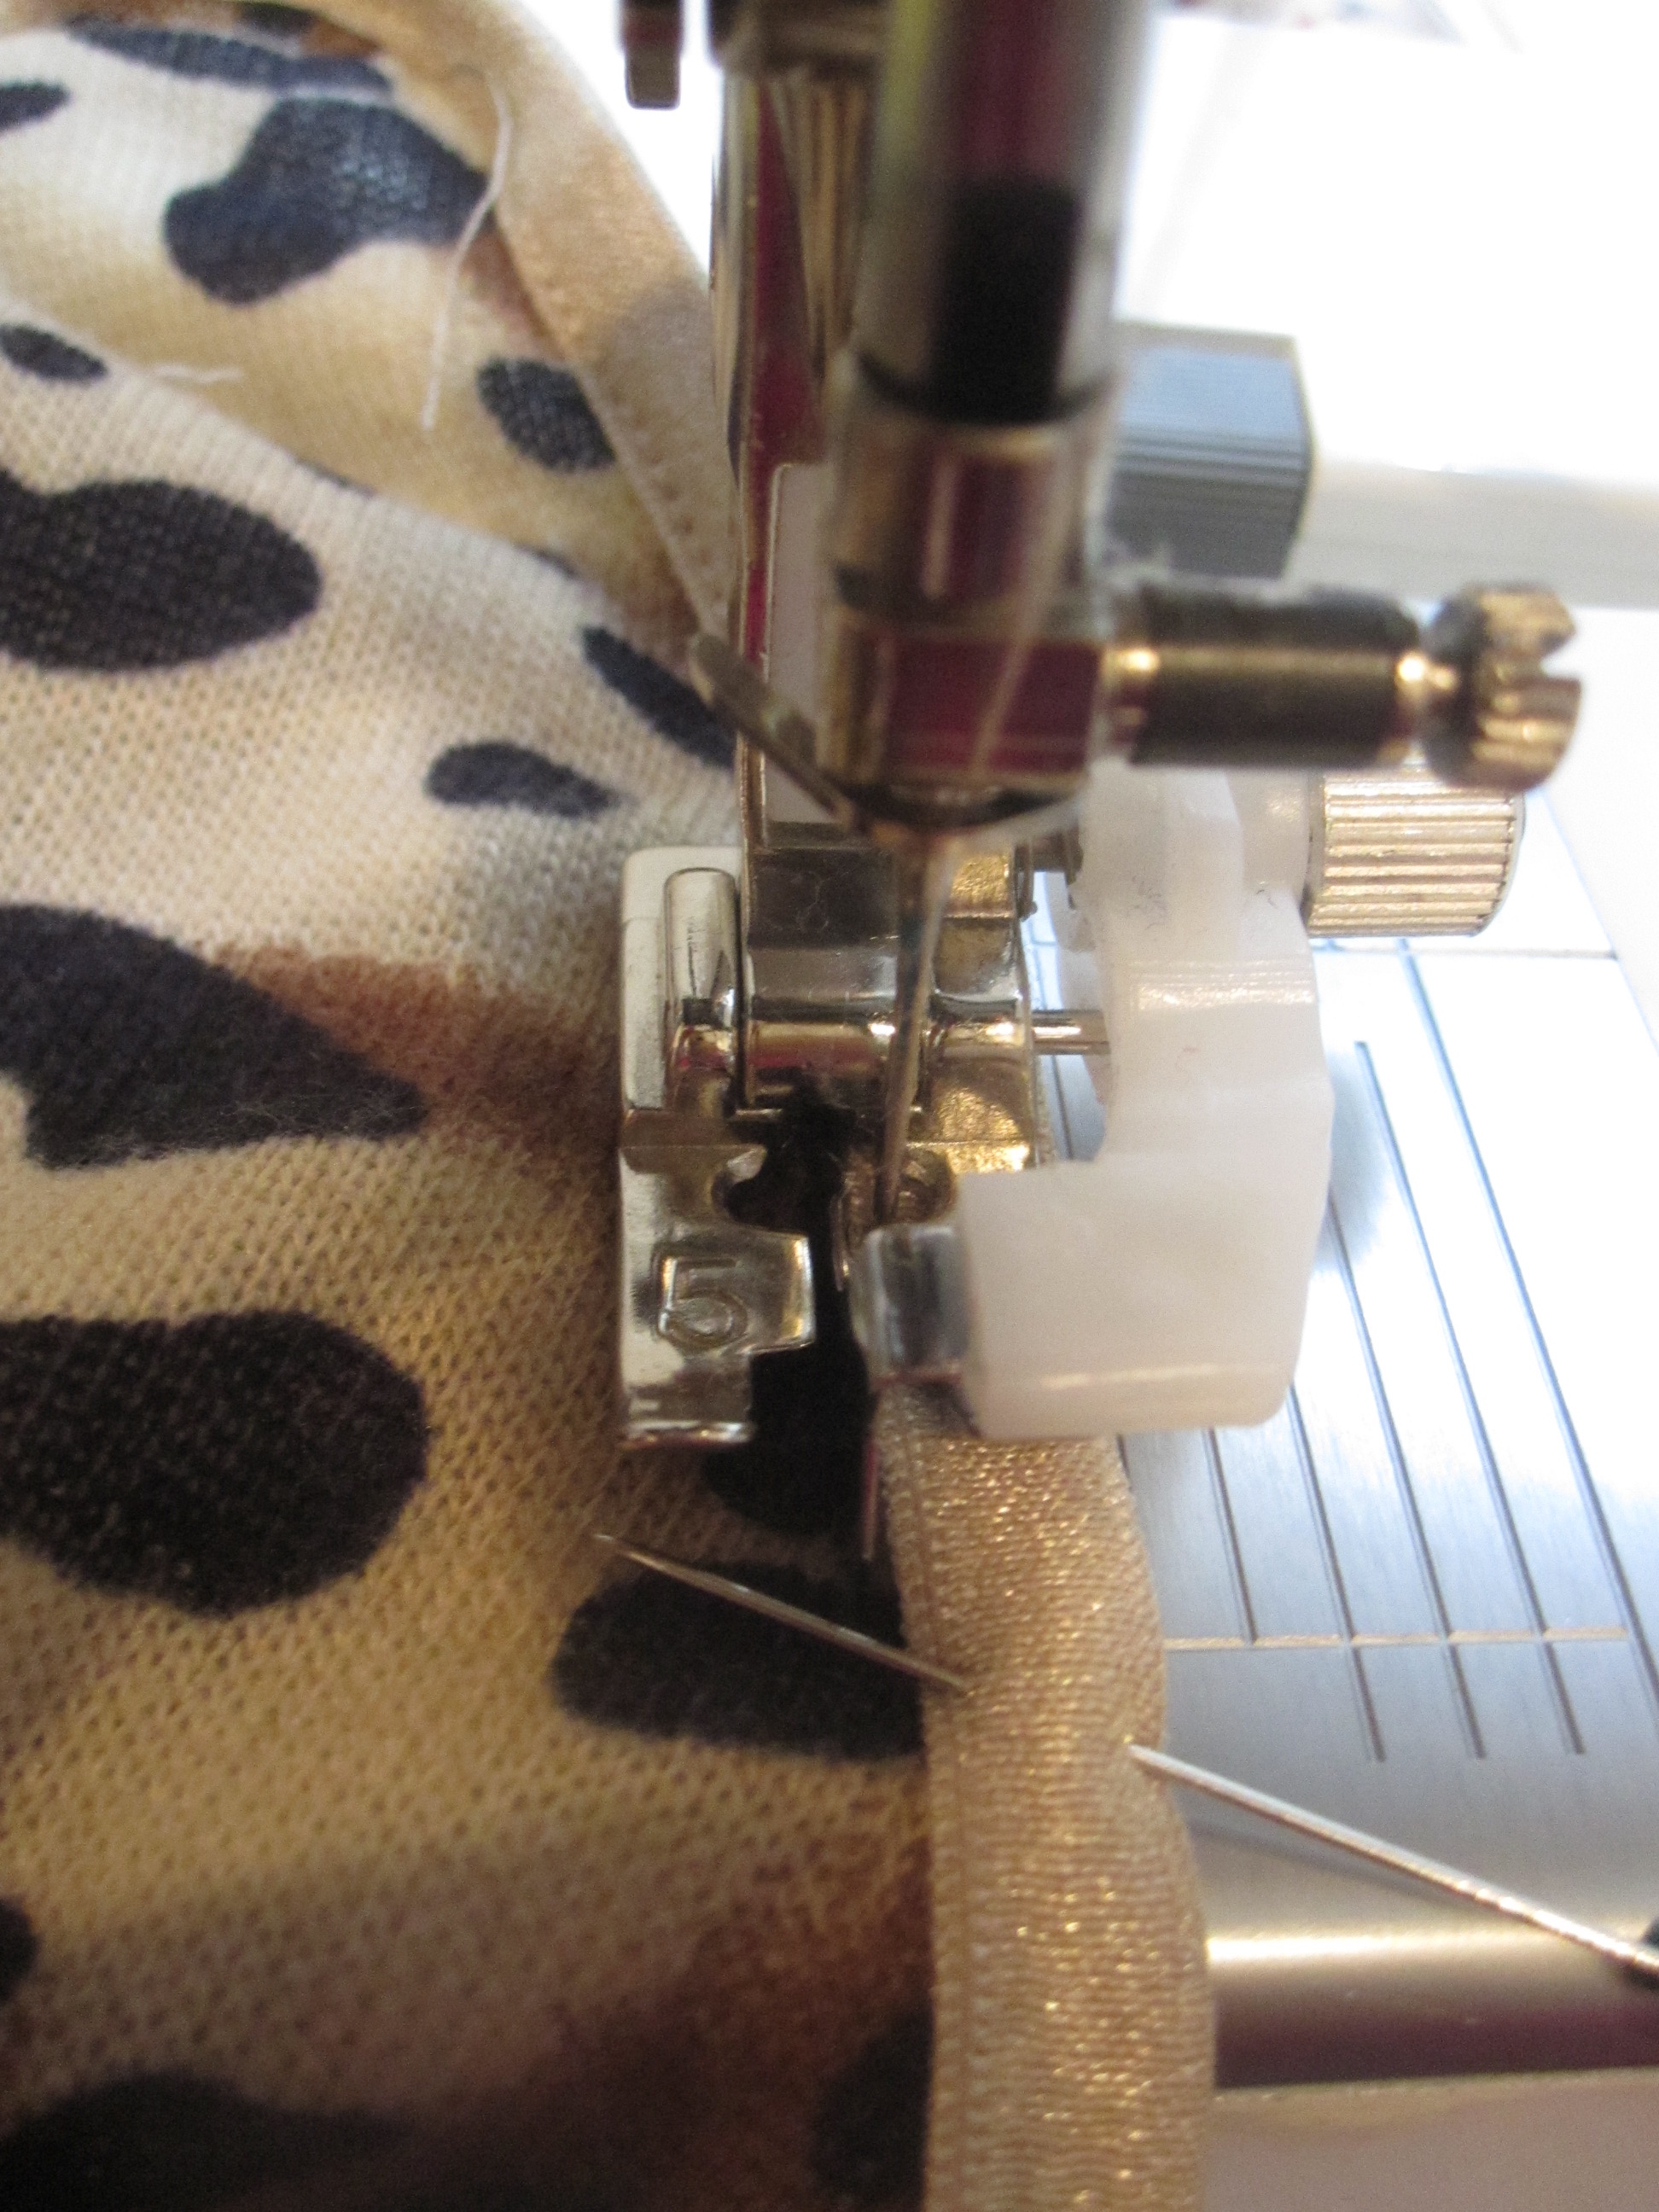
For the next pass, I use my blind hem foot to stitch as close as possible to the edge of the elastic. Stretch slightly as you sew, to make sure you have enough thread in the straight stitch. I have not popped any stitching on FOE I've applied with a straight stitch on the second pass like this--but I generally go for deeper necklines, not higher crew necks. Your results may vary if your neckline has to stretch a lot to go over your held.

Here is the second pass sewn on this dress. You can see that it is rippling a bit at the V neck. We're about to take care of that.
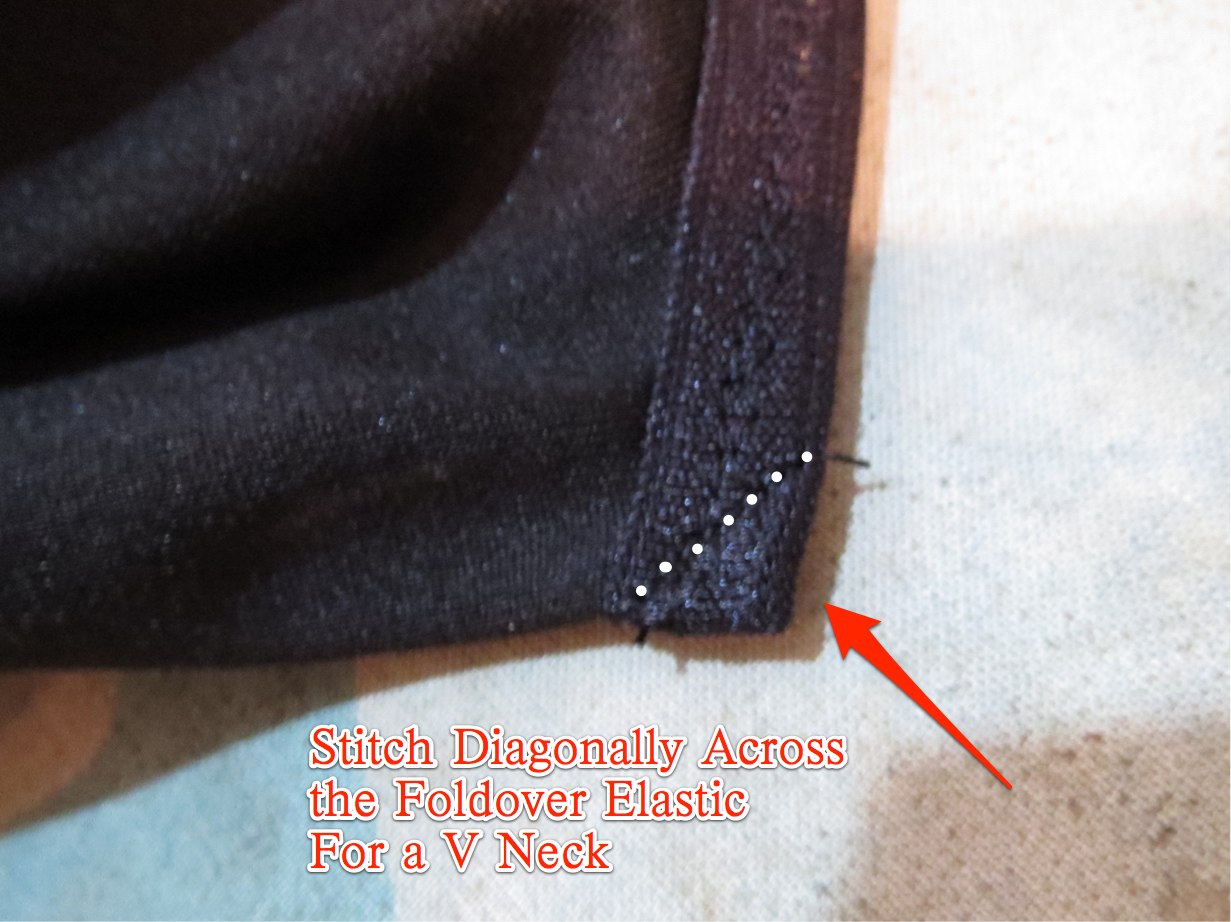
To make the V point, fold the FOE at the marked center front, and then stitch diagonally across it as shown by the white dots. Press to one side and you have yourself a little V.

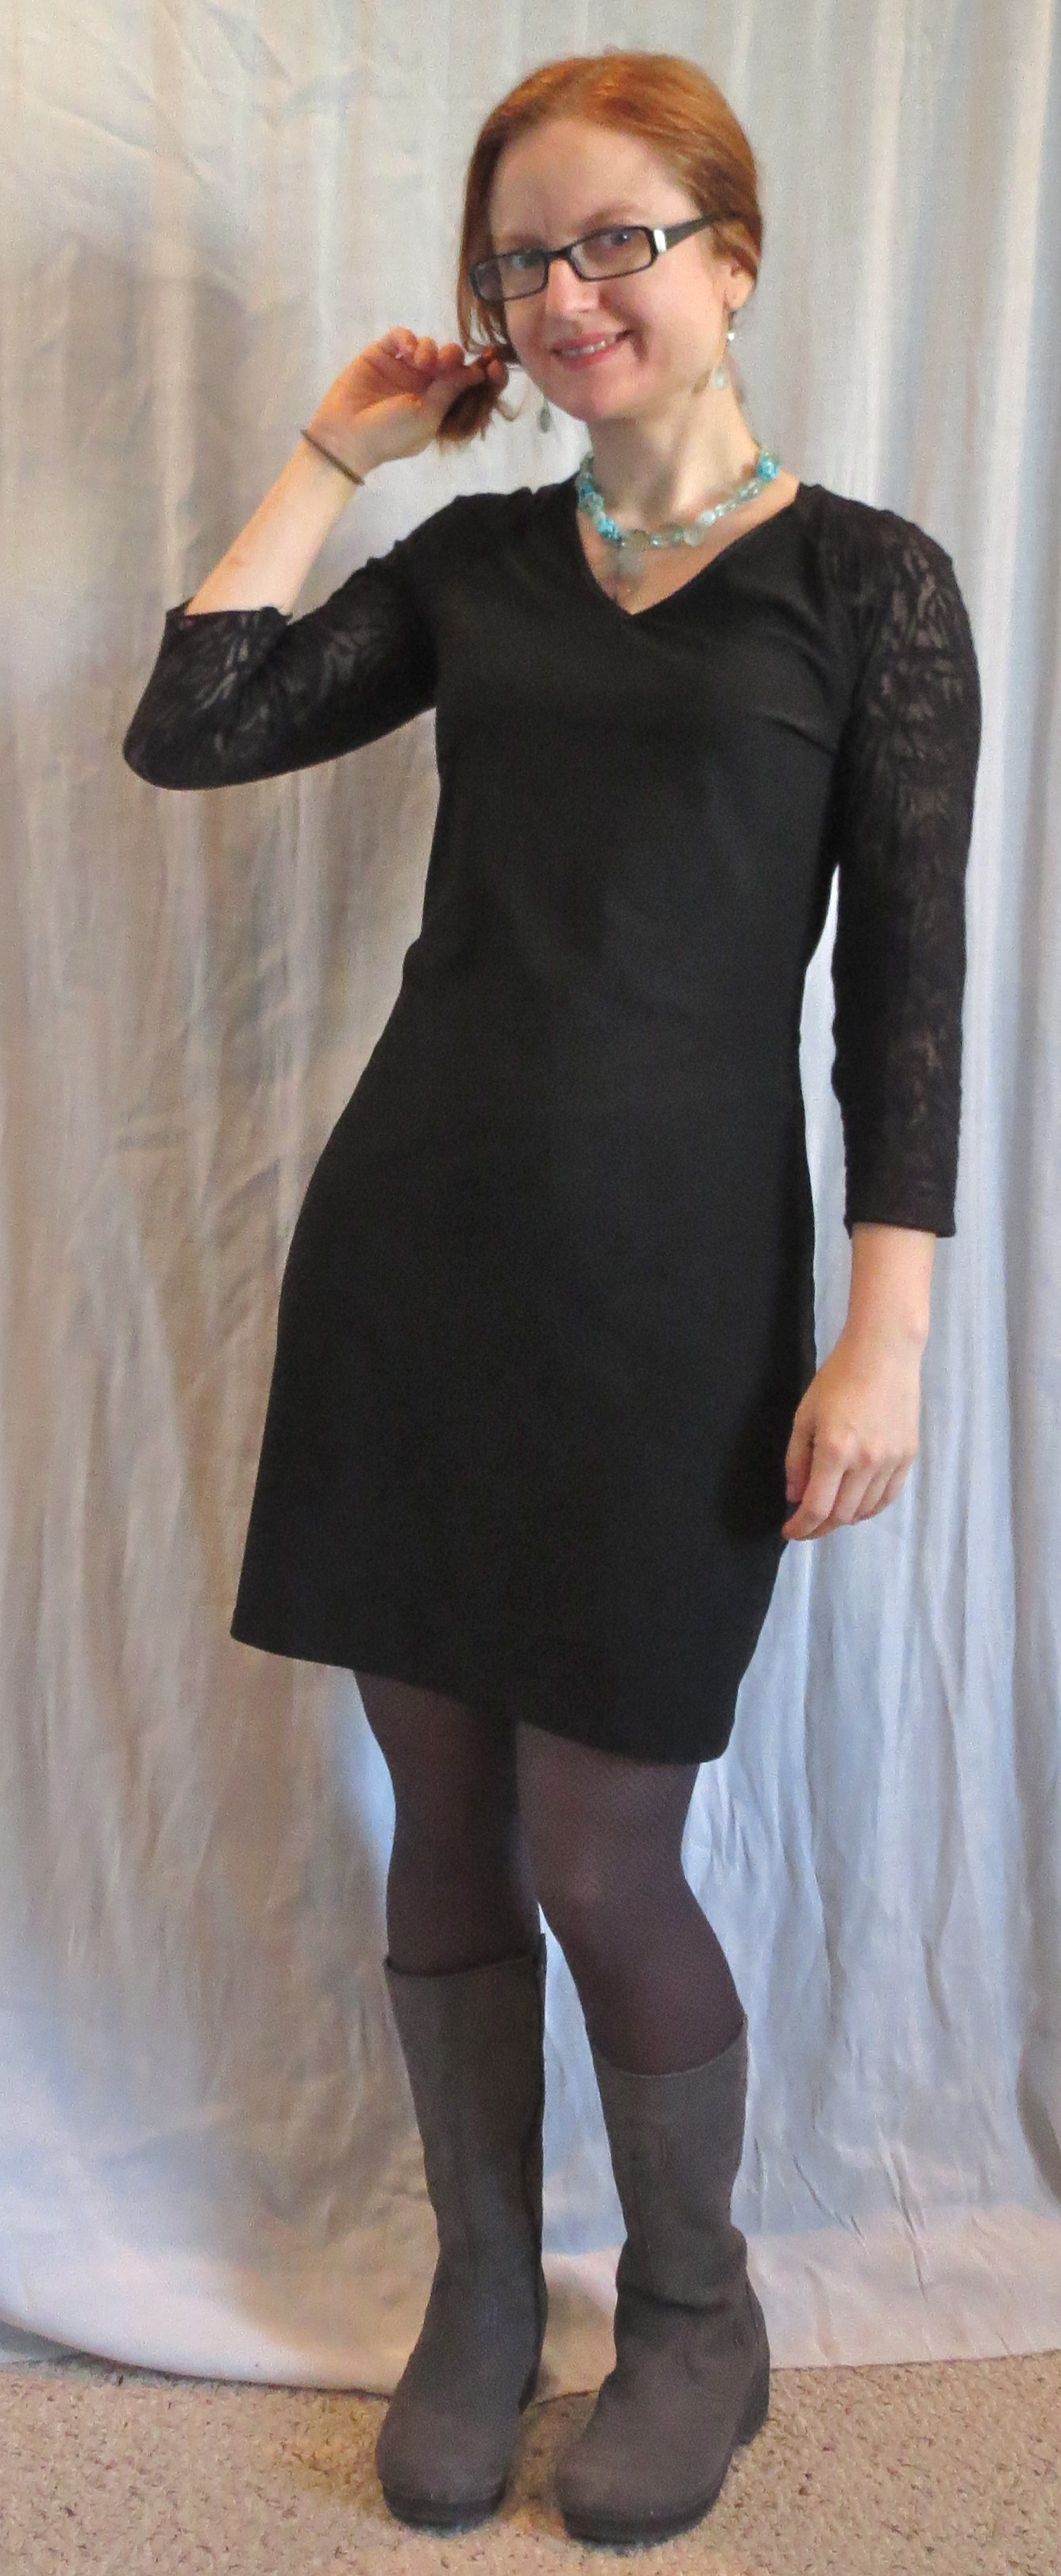
The impetus for this dress was a request from the boyfriend. We were out to dinner one night and a girl walked by in an open back top like this one. He had strong feelings about how much he didn't like it, which was kind of hilarious because he is *not* a fashionisto.
At any rate, the conversation somehow became him asking, "So, do you have one of those...black dress thingies?" And I was like, "You mean a Little Black Dress?" He wasn't familiar with the term as such, but it appeared that's what he was talking about. I do have a couple (literally two) identical fitted knit dresses that I wear on our dates in the winter, but since I *never* wear black he had never gotten the full LBD effect. This was on my project list anyway so I bumped it to the top. He was pleased with the results.
All photos are here and the pattern review is here.
Comments
Post a Comment