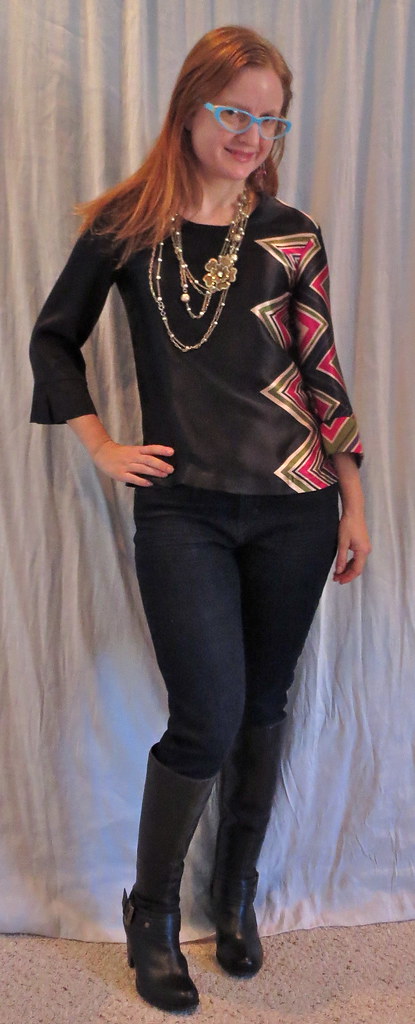
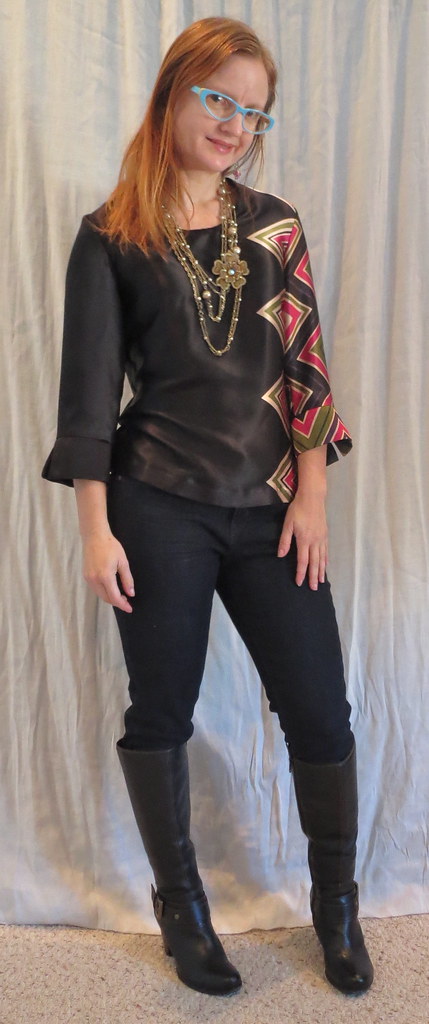
Silk Tops for Fall/Winter: Side Border Print Pullover Woven Tee
If you know me, you know that when the weather gets cold I start to whine because I don't have any cold weather tops. This year, as always, I was determined to deal with that situation.

I looooove silk, but I can't wear it when it's the least bit warm because I sweat like crazy in it. So Fall/Winter is when I get to indulge my fiber love, at considerably less than retail--like this GIULIETTA Silk-satin top, $475 from net-a-porter.
For my winter silk tops project I am loving my pullover woven tee pattern, perfected from a base of Burda 12-2007-123 as described here. The pattern still isn't perfect--I changed the dart to an angled one after this project but I don't have the length exactly right--but it is SO NICE to just cut it off the pattern as is and sew it up, knowing it will fit and is the right length. I marked the pattern with "skirt" and "jeans" hem lengths (the jeans length is about 1 1/2 inches longer, as skirts are worn at the waist and jeans below).
The star on this top is the fabric, so I kept the rest of it fairly basic. I got this zigzag print silk at London Textile at PR Weekend Philly 2010 for $5/yd. I used some of it to make an (unreviewed) negligee a couple years ago, but it was a large piece and I had a lot left.

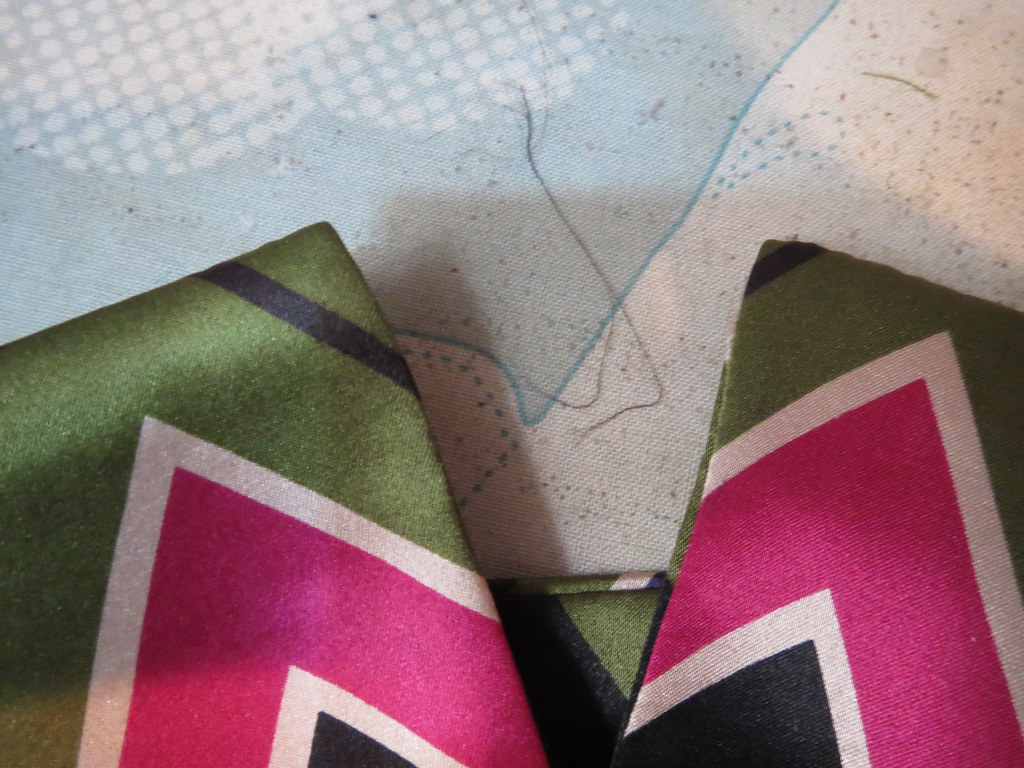
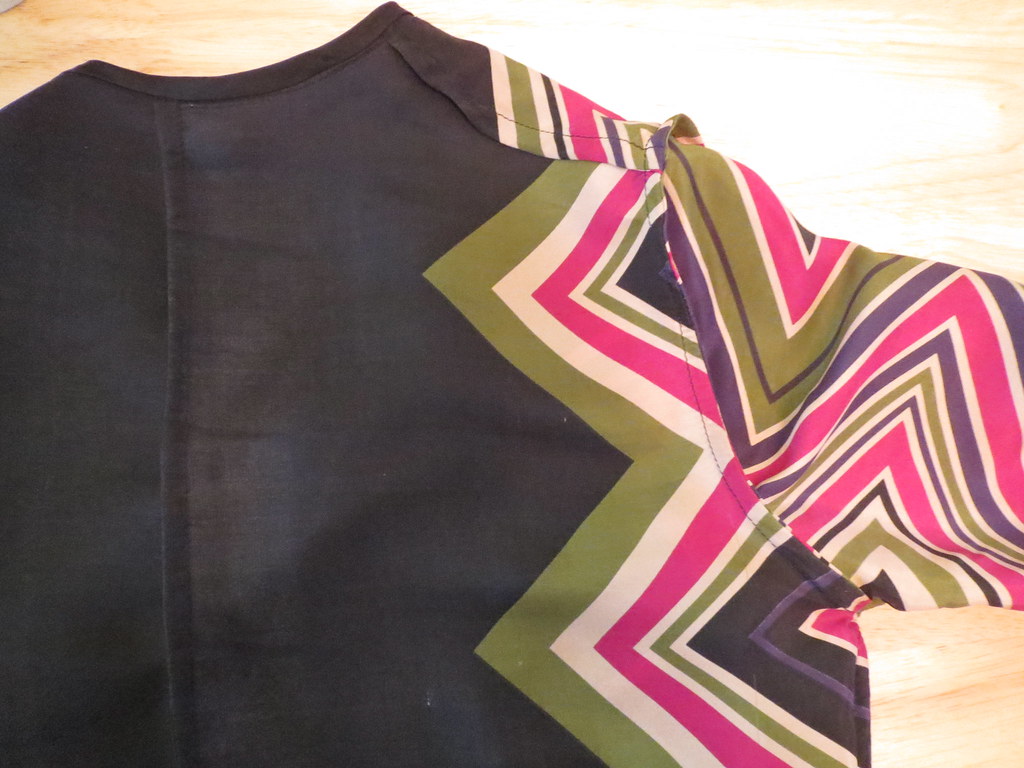
The print is a little tricky because the zigzag portion is about 15 inches long, and there are about 24 inches of black in between the zigzag prints. It's hard to make the most of the fabric without waste! I felt fairly brilliant when I hit upon the idea of using the print sideways on this top.
To get the print placement right I made a full-size pattern piece for the front, carefully marking the bust apex so I wouldn't have a big ol' arrow pointing to it. I cut the back so that the tips of the zigzags would be just outside the long back darts. Apparently, I didn't mark my darts well enough and they ate the tips of the zigs, but silk does not take kindly to unpicking so I decided to live with it.
My only flourish on this top was to add cuffs, which I took from Vogue 8379 (as seen in my perfect knit wrap dress). I just added width to the cuffs to match my sleeve pattern--as the Vogue is a knit pattern they would have been way too tight in a woven.

Making square corners is always a challenge. I have always dutifully followed the pattern instructions to clip the corner and then tried to sort of squish my way into a square. It doesn't generally work out too well. Lately I've been experimenting with *not* clipping the corner, but turning the seam allowances down at the stitch line, as shown in the photo, and giving that corner a good press before trying to turn it so it's as flat as possible.
It can take a few tries to get the corner turned with the seam allowances all staying in place, but the result is a nice, sharp corner I can be proud of. This doesn't work with bulkier fabrics, but for a silk with light interfacing it's a good strategy.
As is my usual practice for silk, I sewed everything with a French seam, including the armscye. It takes a little time and patience, but I do love how beautiful everything looks on the inside.
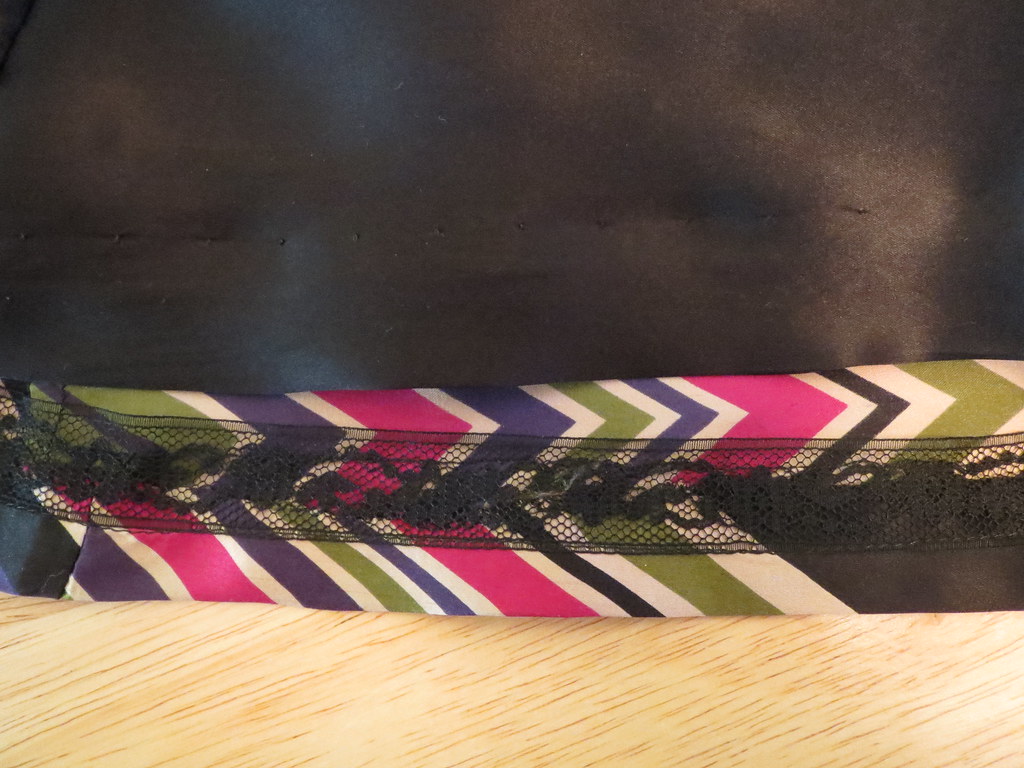
I had a hard time getting a double turn on the hem--this silk is fairly sturdy and it would have been a big production to ease in the longer inner curve. I used hem lace instead. It is stitched with a machine blind hem; it's not invisible, but I'm not fussy.
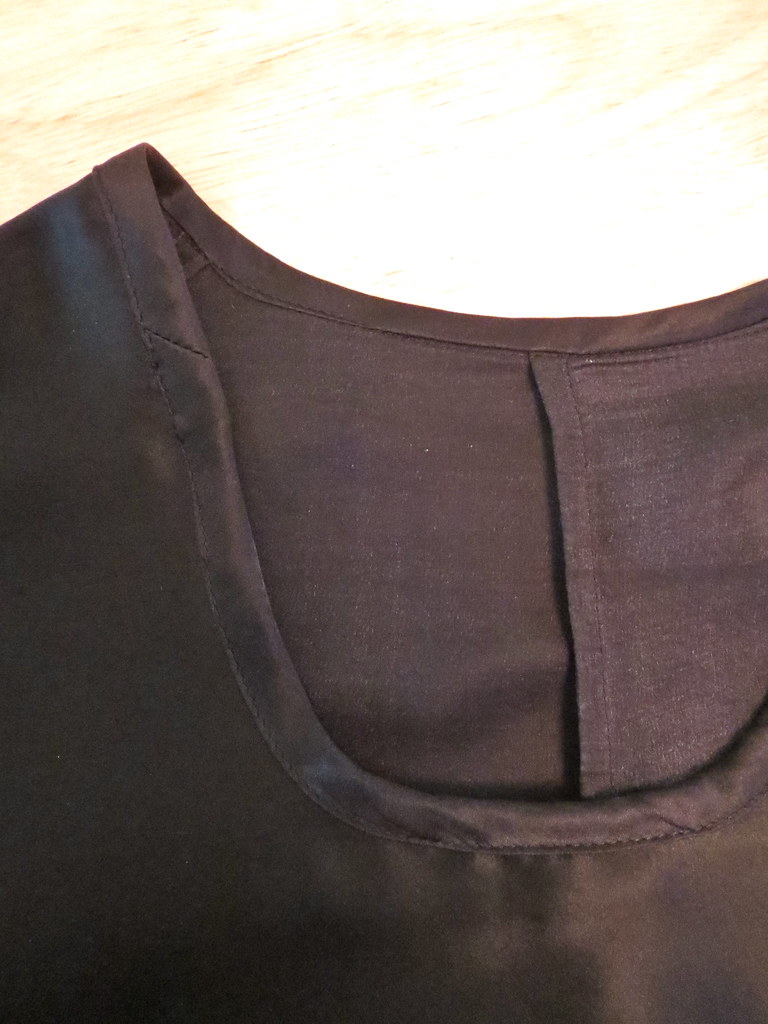
The neckline is bound with self-bias tape. I considered using the print for the bias tape, but I wanted to make this top classy rather than my usual zany/fun. I actually regretted adding the cuffs when I finished it, because I felt like it wasn't totally obvious they were cuffs but maybe some sort of ruffley thing. They've grown on me, but I am still glad I went with plain black for the neckline.
I wish I could claim credit for the sleeve perfectly matching the front, but that was total happenstance. Crazy! I put the sleeve in the most fabric economical placement I could come up with and didn't even consider trying to match the print.
I am very happy with this top, the first of several silk tops I've made for this season. I think I achieved my aim of looking classy and expensive without compromising my love of bright colors.
All photos are here.
P.S. Happy New Year!


Comments
Post a Comment