Vogue 8907, Asymmetric Collar/Cape Silk Chiffon Blouse

I had never even noticed Vogue 8907 until Allison C showed hers as part of her Italy travel wardrobe and then I *had* to have the pattern. A pullover top with a cool detail? Yes please!
I bought the snakeskin print at Chic Fabrics in New York ($10/yd) in November 2011 to force myself to get rid of this wrap top; I didn't make a broad back adjustment on the pattern and the top was just too tight across the shoulders. But I really loved the fabric and wasn't letting go of it; when I bought the replacement fabric I was forced to rotate the top out of the closet.
I don't like this fabric as much as the fabric in the top I had to get rid of because the huge print motifs were very difficult to manage. I didn't want to center the medallion thing, but the print repeat is very wide so I basically had to just put it to one side. It just looks kind of weird. But I think the large collar/cape sort of minimizes the prominence of the medallions because the cape is the feature, rather than the print.
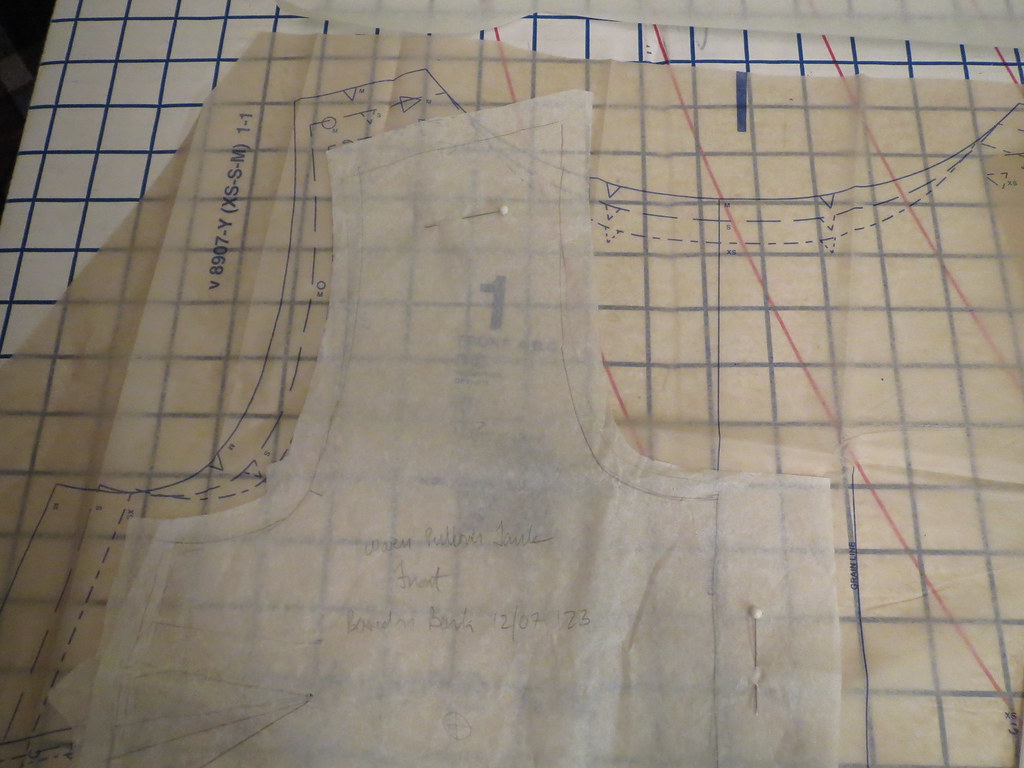
Since I already have a pullover woven top that fits me (almost) perfectly, I didn't bother using the body of the Vogue. I just used my TNT, tracing the Vogue neckline onto it.
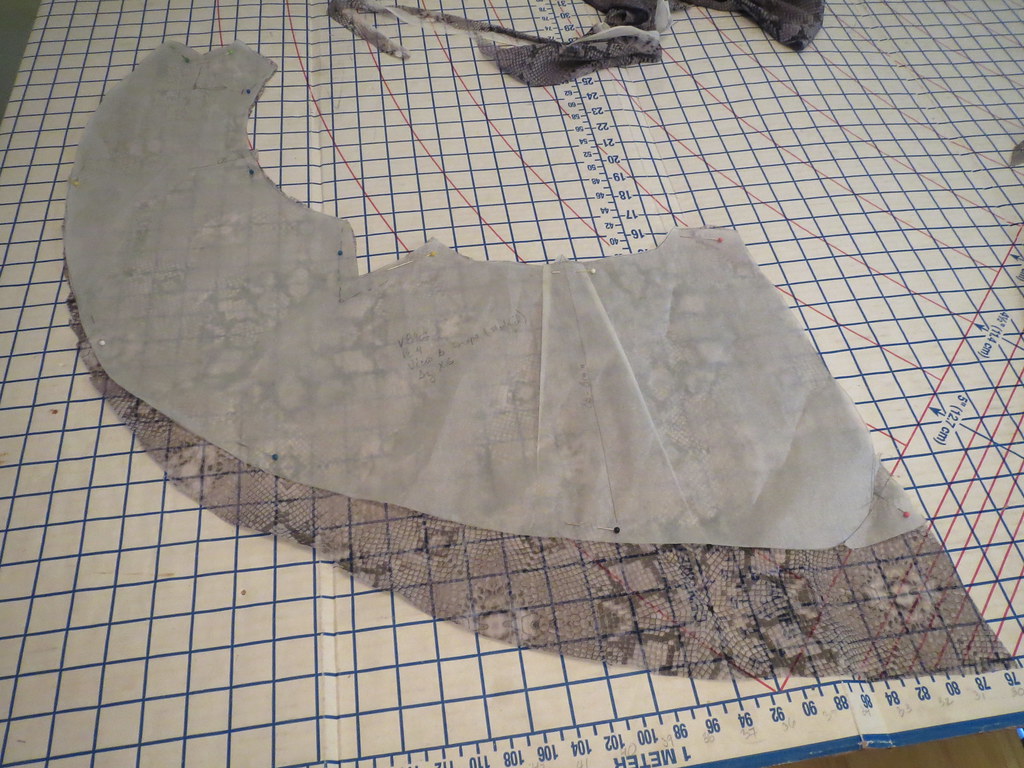
As drafted, the cape is cut longer than the blouse and is caught into the hem to create a blouson effect. I didn't have enough fabric to do the full length cape, so I used my large French curve ruler to trace a gentle curve onto the cape. In cutting, I made the cape as long as I could with the fabric I had left after cutting the body and sleeves.
I also adjusted the neckline of the collar/cape to match the narrower back neckline of my TNT (back necklines on commercial patterns always gape on me) by taking tucks on either side of the center back marking. I finished the collar with a serged rolled hem. Easy peasy.
Lining a sheer piece always presents the conundrum: to line or underline. I prefer the lining to hang free, but I always get tripped up at the hem. I have a very hard time getting the hems perfectly aligned with one another, especially when one of the layers is a tricky, slidey, unevenly drapey, impossible-to-keep-on-grain silk chiffon. I have ruined at least one project at this final step.
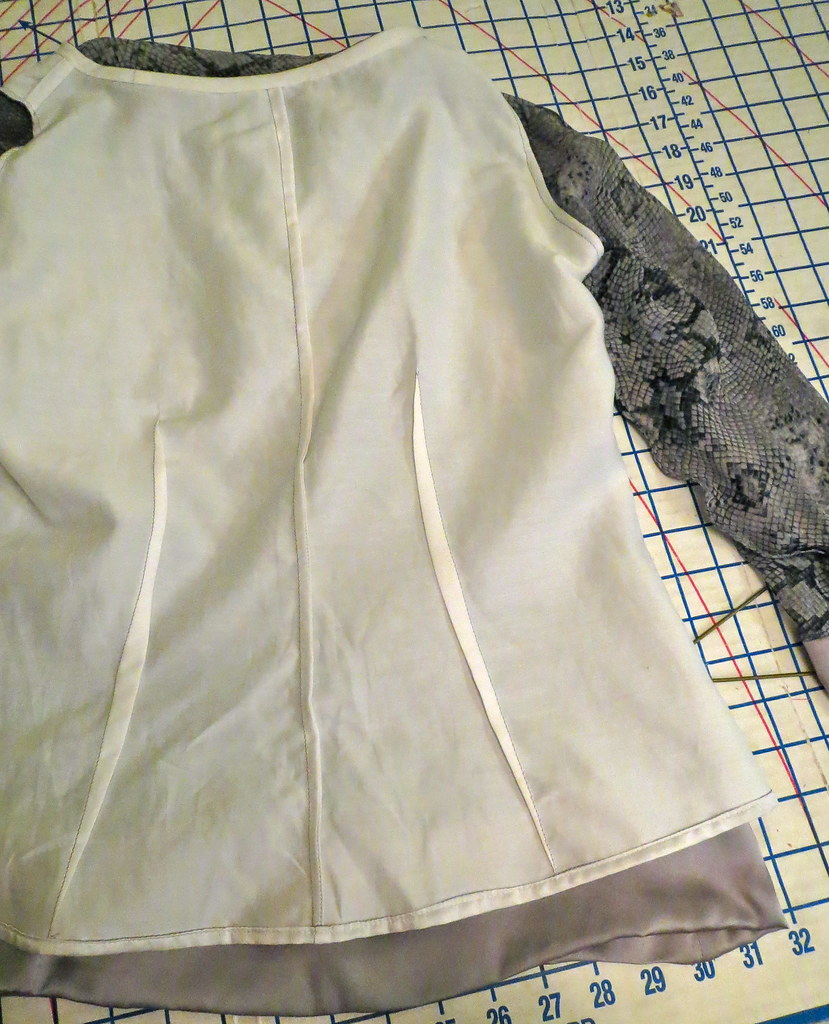
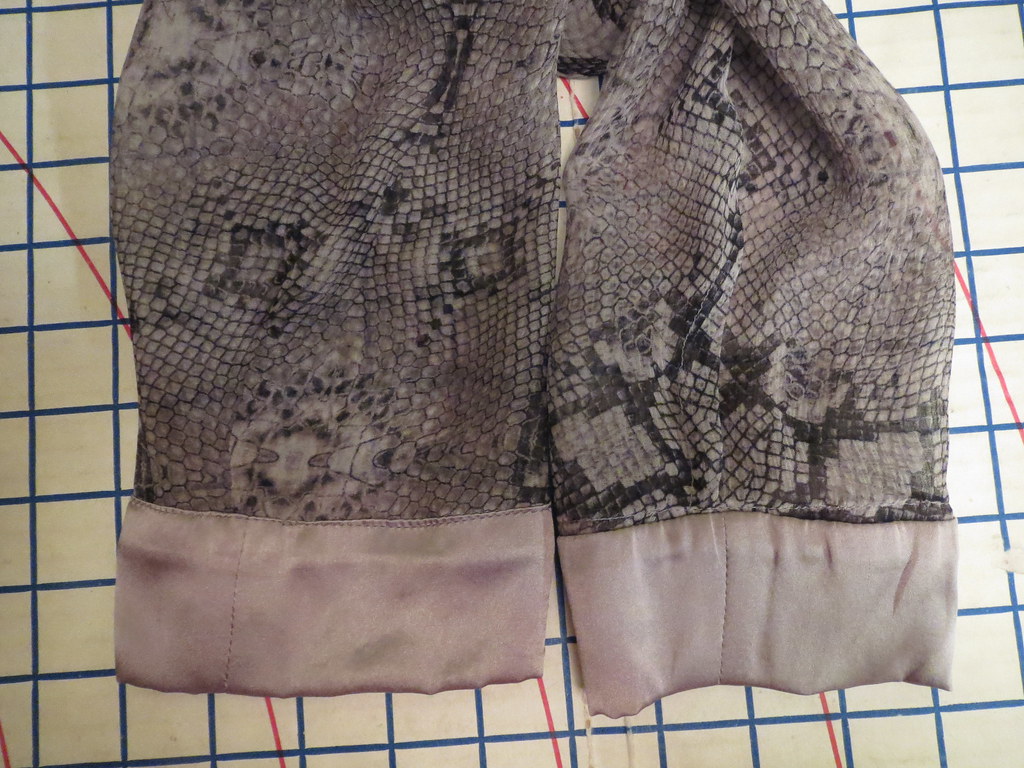
Combined with my fabric limitations here I hit on what I thought was a genius solution: finish the chiffon layer with an opaque hem band, and then the lining would only have to fall somewhere within the confines of that hem band, and if it was a little crooked it would make no difference. What a relief! Of course, this added an extra 4 or more hours to the project given I had to construct everything with French seams twice (once for the fashion fabric, once for the lining) and them apply the hem and sleeve bands, but I'd rather spend more time on a garment I will actually wear.
Using the bands also gave me that little extra length of fabric for my collar. Win-win!

The lining is joined with the chiffon at the neckline and the armscyes, hanging free at the side seams and the hem. I am particularly proud of my best-ever French seams at the armscye. Look how narrow and perfect!

To sew on the bands (both hem and cuff), I first stitched the right side of the band to the wrong side of the fabric. Then I pressed under the seam allowances on the other edge of the band and folded over to the right side of the fabric. It's important to make sure that your folded edge extends a little beyond the first pass of stitching so it will be hidden.
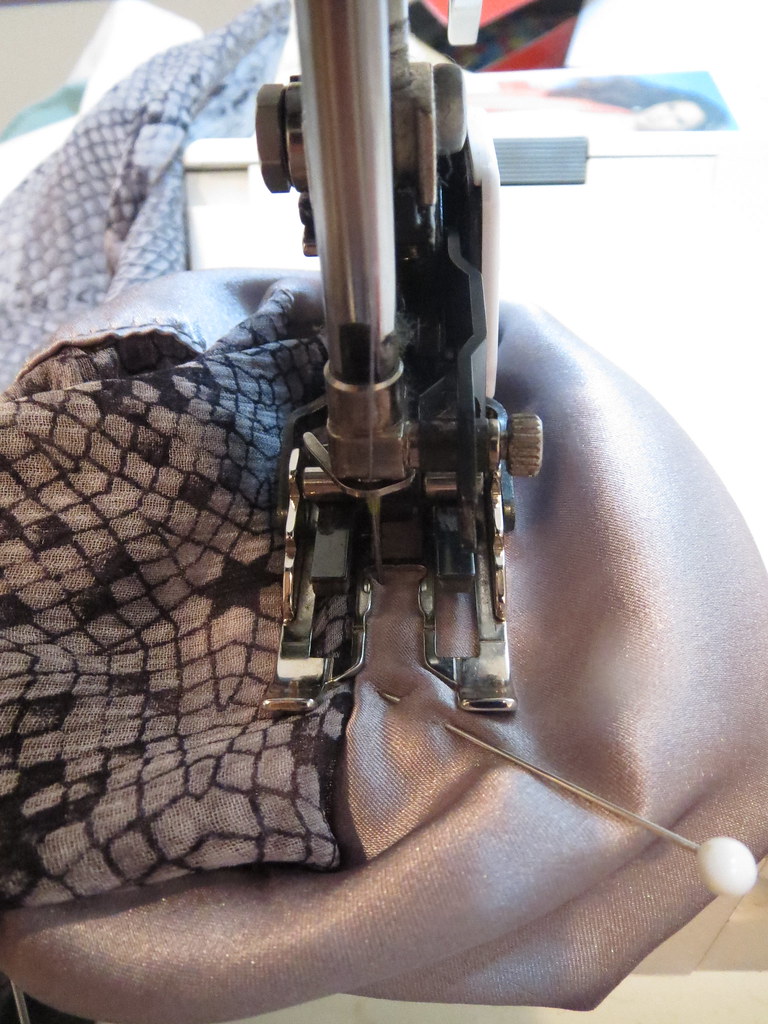
Finally I topstitched the bands in place. Stitch-in-the-ditch while desperately trying to make sure you catch the underside of the fabric is way too much trouble for me.
The walking foot was a huge help with the silk, I don't think I could have gotten smooth hems without it.
This creates a beautiful look inside and out. I think the topstitching on the outside might bother some people, but it looks like a nice finish to my eyes.
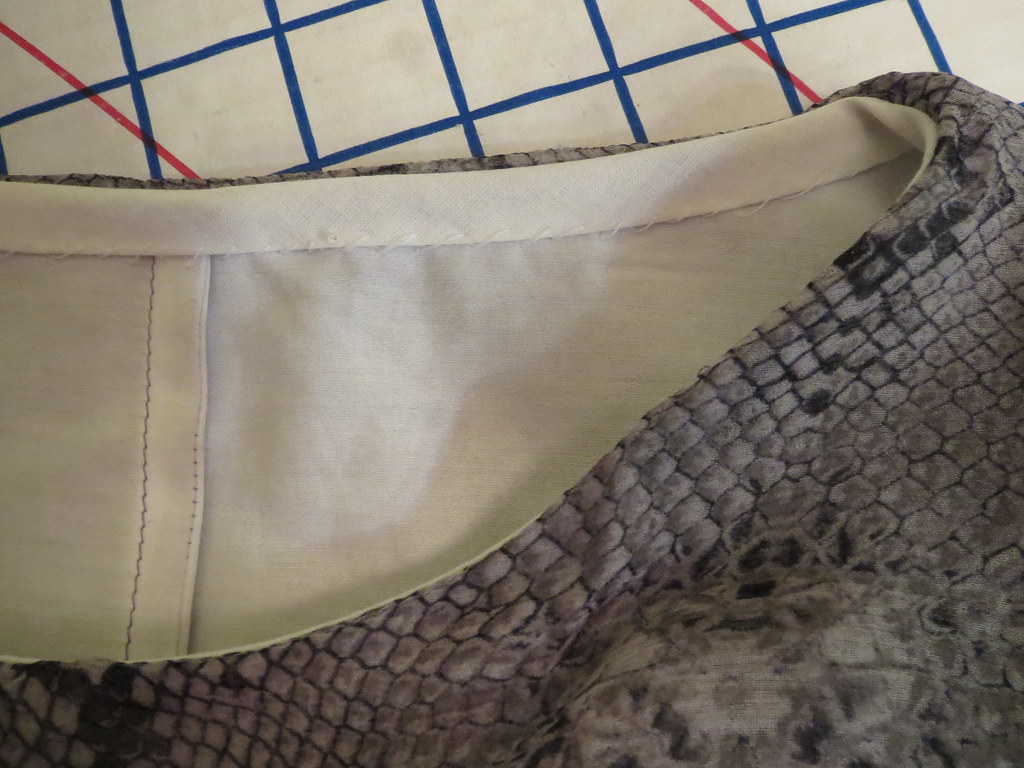
To finish the neckline, I used bias tape on all the layers at once--collar, fashion fabric, and lining. I hand stitched the bias tape to the lining to make sure it stayed flat.
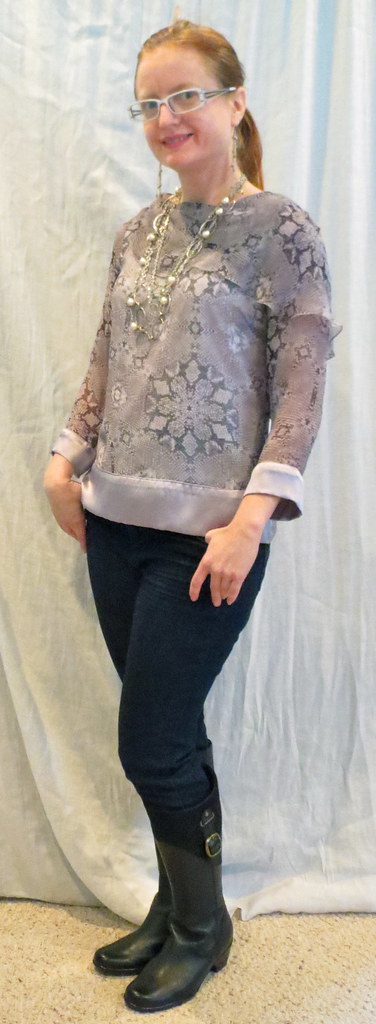
I am in love with this top! The silhouette is not my usual. Though it has shape, it is not closely fitted through the waist, and a defined waist with a belt or sash doesn't work with this style. It can only be worn with jeans because it's too mono-column with a skirt and I don't want to tuck in and risk wrinkling the hem band forever. But it is not *completely* shapeless and it looks current (at least I feel a little stylish in it).

The cape is interesting and I hope not totally weird, even across the back.
I try not to buy sheer silk fabrics because they are such a pain to work with *and* have to be lined so they feel like quadruple the work of opaque fabrics, but I have (well, had!) two in stash, this gray snakeskin print and a purple floral sheer for summer. I'm so happy with this pattern that the purple floral will be made into a sleeveless version of this top when the weather gets nice again. I have only one yard of it so the collar may be quite small indeed. I'm even considering trying to find a mesh knit that looks good on both sides to do View A, the symmetric cape version. This pattern is a surprising hit!
All photos are here and the pattern review is here.


Comments
Post a Comment