McCall 6069, Knit Cowl Dress
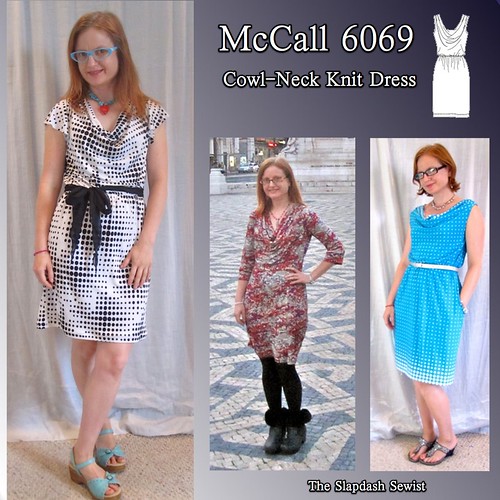
More stashbusting! It had actually been a really long time since I made an easy knit dress. I had forgotten how quick and instant gratification they are!
I made M6069 for the first time in the turquoise polka-dot border print quite a while ago, in 2010. I don't *love* that dress. The double cowl is awkward to wear, and I made it a little too long but hemming it shorter would interfere with the border effect. When I passed it up again last week, I decided it was time to rotate it out of the closet. I contemplated my stash and ran across this polka dot knit that seemed the logical replacement.
I have a love/hate relationship with black and white. I love the way it looks on other people, and any time I see someone in a really great black and white print dress I want to make one immediately. But then when I'm getting dressed in the morning, I want to wear a bright color. The thought of wearing funereal black, even with some white in it, is too much for me, especially right when I wake up (I am not a morning person). I rarely wear my black and white pieces; I literally never wear all black.
This dress may have broken the spell. I think the key for me is that the print is black-on-white; the larger proportion of white keeps it bright and fresh. Prints that are white-on-black, with black the predominant color, feel too somber to me. Of course, the first time I wore it I met some friends after work for happy hour and to watch one of their husband's band perform. Of the six of us, five were in black and white. I'm not kidding. Two stripes, two polka dots, and one print. I felt like a noncomformist, just like all my friends.
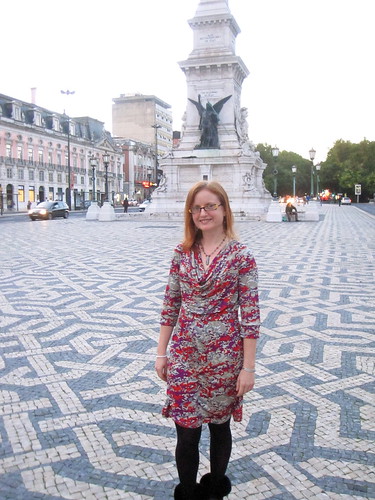
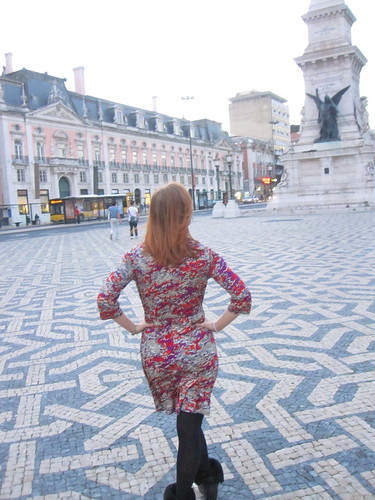
When I was packing for Portugal last Fall I unexpectedly found myself with time to make one more piece to go in the suitcase. So I inventoried my packing plan and found that what I needed was a nice dress that would travel well but really sparkle at night and would be suitable for cooler weather. I was surprised I didn't already have anything that fit the bill, but my knit dresses are generally pretty casual and my dressy dresses don't pack well.
This pattern came to mind, and I had some luscious silk jersey from Michael's Fabrics. I used my TNT t shirt pattern to draft a plain back and made it up. It came out gorgeous! (If I do say so myself.) The luxurious fabric, the saturated colors, the flattering shape. When I finished it, I thought, "This casual elegance is exactly what I want for my entire wardrobe." I don't know that I've managed to effectuate that thought, but I still love the dress.
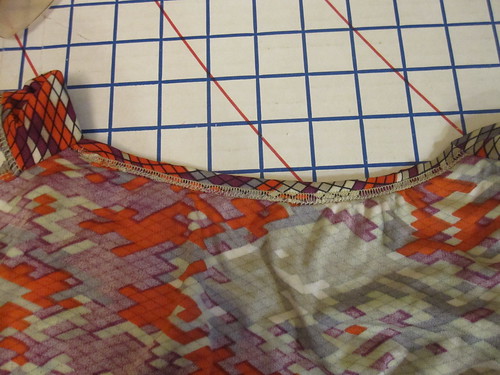
Details on that dress are using the serger to attach clear elastic to the wrong side of the back neckline and then turning under and twin-needling for a neat finish, and cuffs on the sleeves (only because I didn't have enough fabric to cut the sleeves the length I wanted so I had to add scrap cuffs!).
When I drafted the back for the silk jersey version, I somehow made it an inch too short at the waistline. WTF? So I had to shorten the front to match. This turned out to be a fortuitous error, as the dress is much more flattering on me with the waistline raised by an inch. The sloppy waistline location is part of what I didn't like about the turquoise version. So I retained that for this version.
Since I'd already drafted the back, it was really easy to make the latest iteration. I finished in under four hours, and the only trouble I had was the shoulder length of the front and the back not matching up. I was annoyed with myself for doing such a poor job of drafting the back piece. Well, when I pulled the turquoise version off the hanger to put it in the giveaway pile I remembered that I was supposed to put some pleats in the front shoulder to take up that extra width. D'oh! The cowl lays fine without them, luckily.
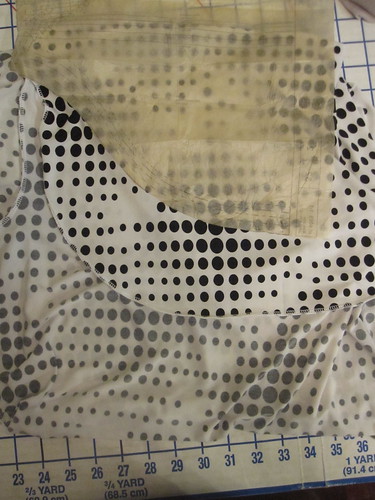
My secret for cowl necks is to extend the self-facing as long as you have fabric for. My ideal preference is for the facing to extend all the way below the armscye, but that takes up a huge amount of fabric and I didn't have enough here (and it would have required drafting the facing piece). Here you can see how much fabric I added to this project. I also caught the cowl facing into the armscye for an inch or two so it would stay folded toward the front. As a result, the cowl stays firmly in place in wearing. There is no chance of all of that fabric flipping to the outside.
I used the flutter sleeve from Burda 03-2008-113 for a little shoulder coverage from the sun without any added heat retention. To make it really easy, I didn't hem the sleeve. This jersey is lightweight without much body, and the thought of trying to wrestle a hem onto the circular curve was too much. The lower hem was easy, though, as it is on the crossgrain and I used a line of dots as a guide to get it perfectly straight for my twin-needle hem.
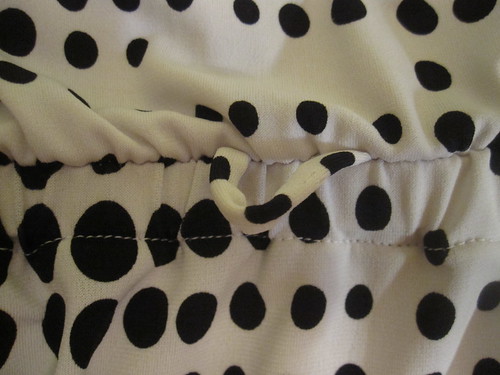
I added a badge hanging loop to the waistline. I am so into this right now!

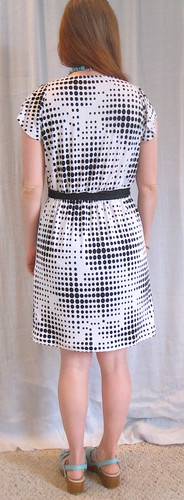
The downside of the black-on-white print is that the fabric is slightly sheer. I lined the skirt part only with tricot from Golden D'Or in Dallas. The front bodice is essentially self-lined with the long cowl and with a flesh-tone bra the back bodice doesn't show anything.
This isn't super-old stash, but it's been lurking around for 3 years. I got it from Fabric.com in May 2010. In all, I used 1 3/4 yard black and white polka dot and a little over half yard (0.58 yard) of the tricot.
I'm so happy with this little dress! I don't think it will get passed over like its predecessor, and I already know the style travels well. I just need someplace exotic to take it...
All photos are here and the pattern review is here.
==============================
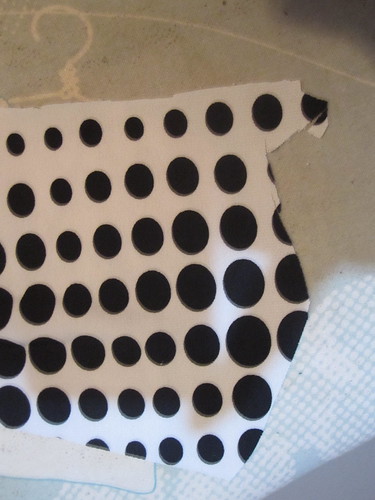
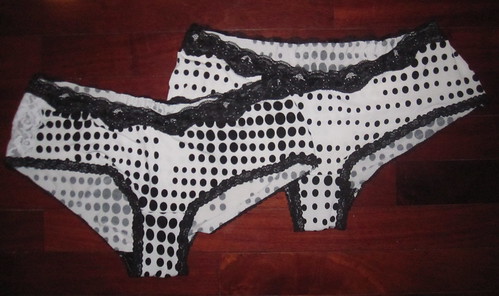
I used up all the full length yardage, which is the criterion for the stash contest (as I understand it). But I had enough scraps left for 2 pairs of panties. Or so I thought, until I looked at the bottom layer front piece. You can see at left that there was a big divot in one of the side seams. Curses!
I contemplated for a moment. The missing part was too large to absorb into the 1/4" seam allowance of my perfectly fitted custom pattern. Time for a random lace insertion!
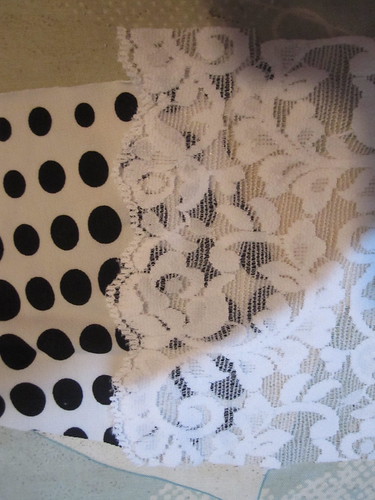
I put the scalloped side of some stretch lace over the side with the jagged seam line, extending about 1/2 inch beyond the missing fabric. I zigzagged over the scallops, and then trimmed away the polka dotted fabric underneath.
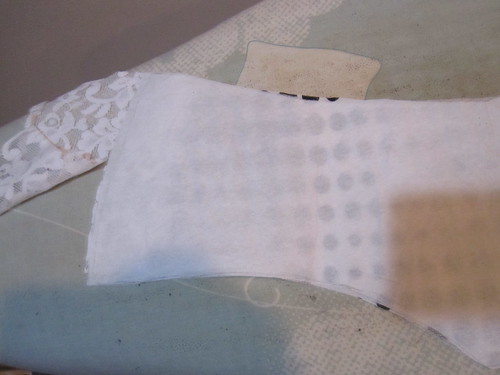
Next, I laid the pattern back over the piece and trimmed away the lace, leaving a perfectly shaped piece of fabric. I constructed the panties as usual.
After all that, I truly did have only scraps remaining. Well, scraps, a cute dress, and two new pairs for the drawer. The only downside of these is that it amuses me greatly to wear unmentionables I've made out of leftover fabric with the dress they match, but I'm afraid these will show through the skirt, despite my tricot lining. So I have to wear them with unmatching clothes. *sigh*


Comments
Post a Comment