Simplicity 1798, 40s Inspired Surplice Dress with Single Collar
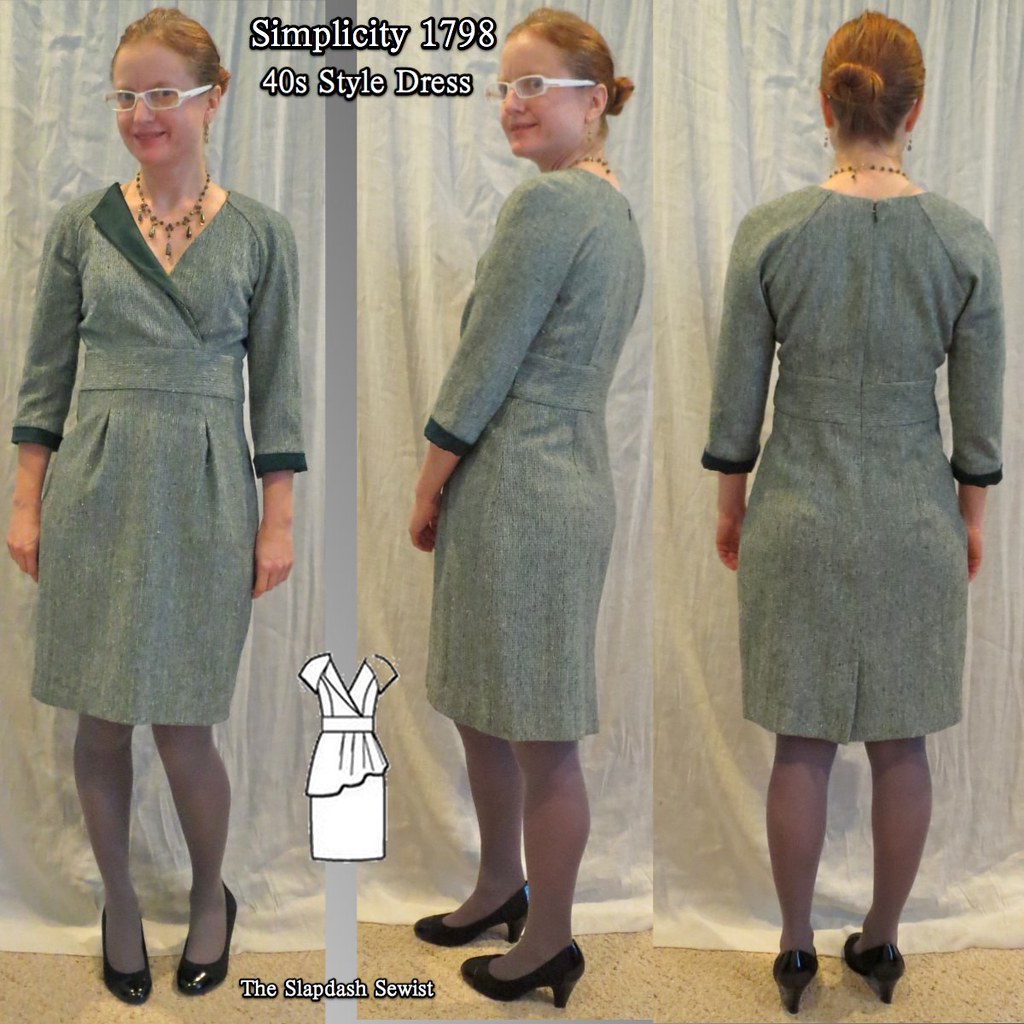
Simplicity 1798 is a Project Runway pattern, so it has all kinds of crazy options, but one of the illustrations shows the surplice bodice with a collar only on the outer half of the bodice. Pleasing asymmetry is ridiculously difficult for me to envision, but since they had done the work for me it caught my eye. I used a wool from The Carol Collection and accented it with one of the Vera Wang silk/rayon blends from Fabric.com's $1.99/yd blowout in January 2010. Coupled with my $1.99/yd Fabric Mart lining, this dress is a lot of bang for very little buck.
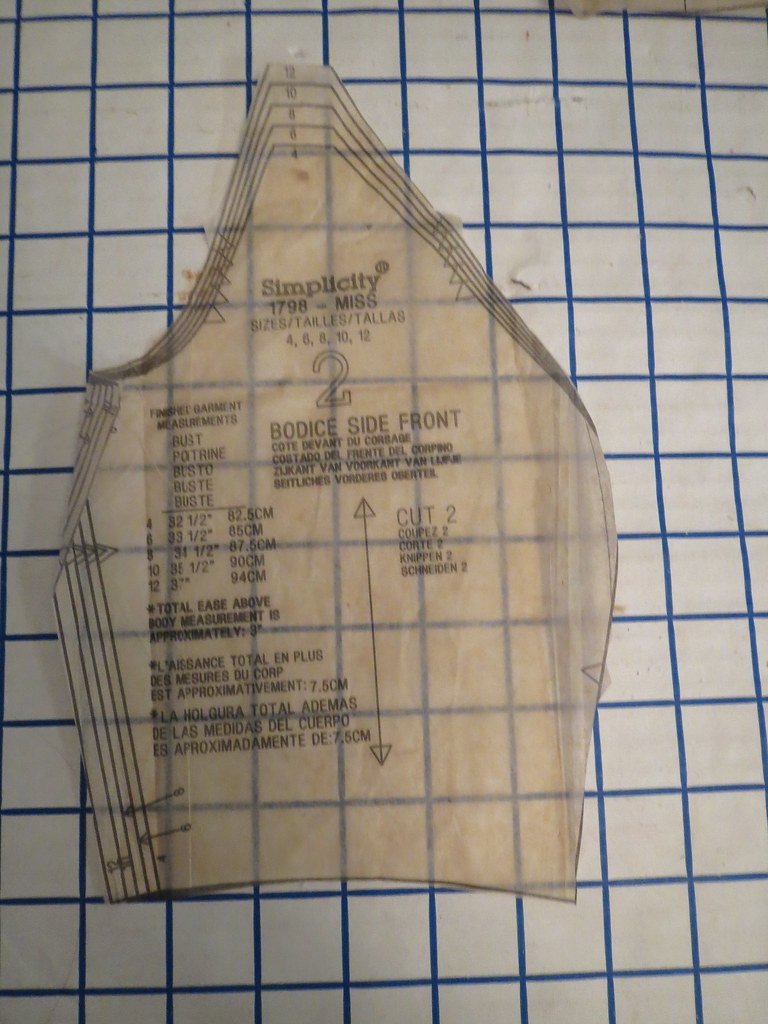
The side front bodice is *very* shaped. I shaved off a bit of the curve for my small bust before sewing and it fit fine around the curve of the bust. However, it was quite puffy above the bust. I mean, I'm not saying they're where they were when I was 18, but they are not that low. So beware that the fullest part of the pattern may not be at the fullest part of your bust. I resewed the seam 1/4" deeper (for a total of 1/2"removed) from the fullness of my bust, tapering to nothing at the armscye. The bust is still a squidge generous for me, but it is not noticeable to even a close observer. I also shortened the front crossover for my small bust to prevent gaping.
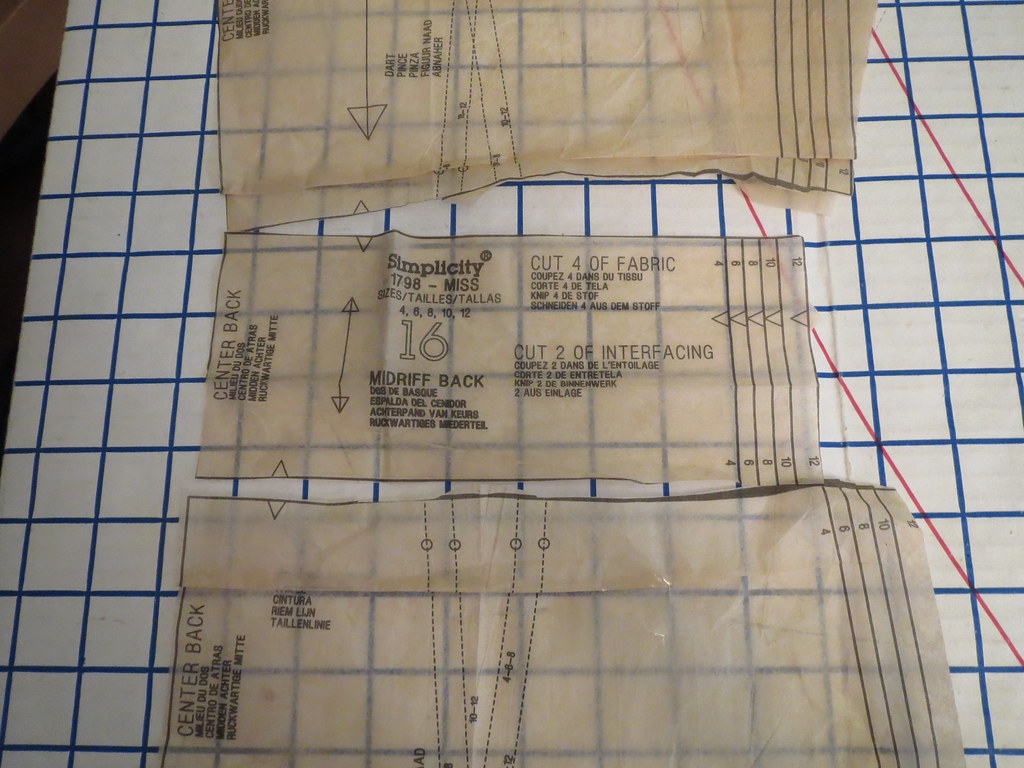
So as not to narrow the midriff, I split the swayback adjustment between the bodice and the skirt. I ended up with a really nice fit.
The fabric is really interesting. On one side the weave shows horizontal stripes, and on the other side it shows vertical stripes. I suspect that the horizontal stripes is the "right" side, but I preferred the vertical stripes for elongation. I used the horizontal striped side of the fabric for the midriff, to increase the hourglass illusion. It's quite subtle, though--I doubt anyone will ever notice!
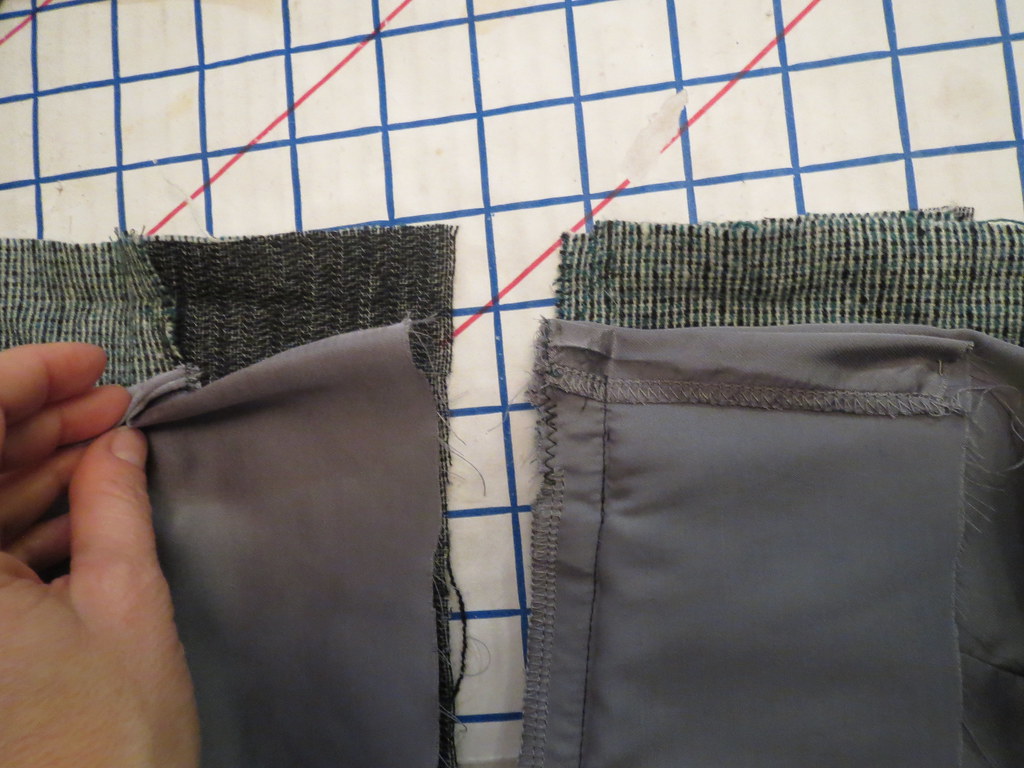
The only thing I don't like about a surplice bodice dress is that you can't line it in the traditional way. The neckline must be finished and the bodice before attaching to the midriff/skirt, as the front bodice pieces overlap. Normally, I just treat the bodice lining as flatlining at the center back zipper in this instance. It's not beautiful but it works. But this wool is somewhat scratchy, as it's more of a jacket texture than a dress texture, and I didn't want to risk having it irritate my skin.
I started by constructing and lining the bodice, stitching the lining to the neckline. I had cut facings out of my fashion fabric, but decided that with the bulk and scratchiness I would just line to the edge. I pressed it so that the fashion fabric overlays the lining by a good 1/8".

Sewing the lining and zipper presented some challenges. First, this fabric is almost coat weight (and is certainly jacket weight). I strongly prefer invisible zippers, but thick seams are a challenge for them to get through. I severely graded my seam allowances at the midriff bodice and skirt seams. Thank goodness it worked!
Then came the challenge of lining.
When sewing the bodice to the midriff, I layered as per usual: The finished bodice with the fashion fabric and lining wrong sides together, midriff fashion fabric right sides with bodice fashion fabric, and midriff lining right sides with bodice lining. I sewed this 4 layer sandwich to within 2 inches of the center back. Then I separated the lining layers from the fashion fabric layers, and stitched the fashion fabric seam all the way to the end of the fabric at center back.

Then I separately completed the seam on the lining. I turned the zipper opening edges of the lining in at the 5/8" seam allowance. So the last two inches or so of the lining is free from the midriff seam allowance, but mostly the lining and bodice are sewn as one at the waist seam.
The skirt/midriff seam is sewn completely separately for the fashion fabric and the lining so that the lining hangs free.

After the dress was fully constructed, I turned the lining under at the center back seam, pinned over the zipper, and hand-stitched in place. It looks like a real lining, even though it isn't (in the sense of not being an entirely separate dress joined only at the outer edges).

I wanted to bring the satin accent in somewhere else, in addition to the collar, so I added cuffs.
To keep the sleeve lining in place, I hand stitched the sleeve lining to the cuff seam allowance.
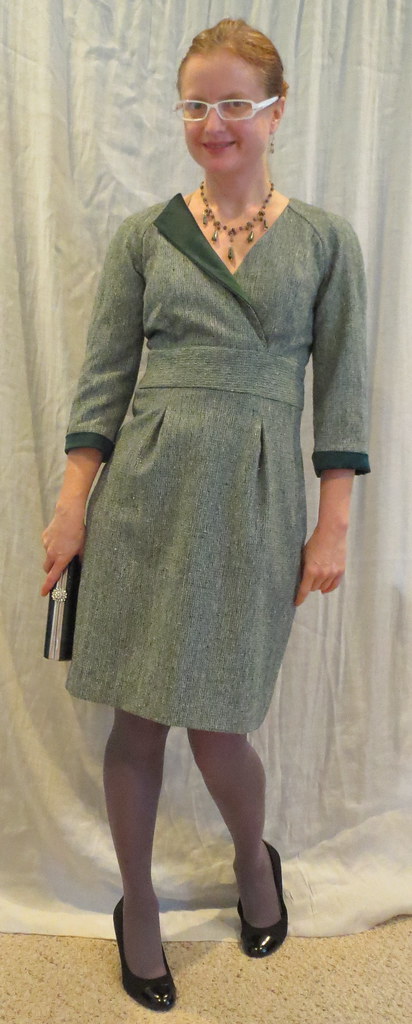
I'm not sure this dress photographs as well as it looks (or at least as well as it feels), but it is sensational. I love the vintage vibe, the single collar is a great detail I never would have thought of had Simplicity not illustrated it on the envelope, and the fit is incredibly spot on. I can hardly believe this is a Big 4 pattern given how well it fits. I feel very confident when I wear this for professional occasions--it is both totally my style and appropriately dressy, which is a hard combination to find.
All photos are here and the pattern review is here.


Comments
Post a Comment